If two people both ask for a C cup, should they receive the same amount of added volume? In most cases, the answer is no. A cup letter describes how a finished breast fits into a particular bra, not how wide your chest is, how much tissue you already have, or how far forward you'd like your breasts to project. That's why A cup to C cup breast enlargement works best as a starting conversation, then gets translated into measurements, photographs, and a route that fits your anatomy.
Table of Contents
- Options for Going From A to C, Compared
- Turning a Cup Size Into Measurable Goals
- Fat Transfer Planning and Realistic Volume
- Implant Route Risks, Consent and Surveillance
- Recovery Timeline and What to Expect
- Prepare Your Measurements and Book Consultation
Options for Going From A to C, Compared
An A-to-C request is usually shorthand for about a two-cup increase. Treat that phrase as a communication goal that signals a noticeable change. Chest width, skin stretch, and the tissue already present still decide how much volume one operation can support.
Two surgical routes come up in this conversation. One places an implant. The other moves your own fat. They split on how sure the added volume is, how many sessions you may need, and what you are agreeing to years later.
Implant and Fat-Transfer Routes Compared
| Option | How volume is added | Reported volume reference | Predictability | Typical session plan |
|---|---|---|---|---|
| Implant augmentation | Silicone or saline implant placed behind or over breast tissue | Volume selected in cubic centimeters from chest width, breast dimensions, and desired projection | The device has a known size, though rippling, capsular contracture, and later revision remain possible | Typically one operation |
| Fat transfer | Patient's own fat harvested and re-injected into the breast | A moderate amount of processed fat per augmentation, usually a smaller step than a large implant | Some transferred fat is reabsorbed, so a touch-up injection may be needed | May need staged sessions |
With fat transfer, the surgeon harvests fat, often from the abdomen, processes it, and re-injects it into the breasts. The breast feels soft because the added tissue is yours, and the donor area is contoured in the same procedure. Survival is the limit. Fat that does not take cannot hold size, so a full two-cup change this way can take more than one round.
Raise Your Cup® is Ideal Face & Body's name for natural breast augmentation. It is a no-implant procedure that uses your own fat, removed from stubborn areas like the stomach, to enhance and reshape the breasts.
A full A to C change is a surgical question. Non-surgical methods do not add lasting breast volume in this range, so the practical choice is an implant or your own fat.
Ideal Face & Body offers both routes: breast augmentation with implants, breast implant revision, and explant, as well as Raise Your Cup® fat transfer. Awake breast lift and awake breast reduction are separate, implant-free procedures. An implant works like a measured container: the cubic centimeters going in are chosen in advance, and you also accept a device that can ripple, harden, or need replacement. Fat transfer works like a graft: only the portion that lives becomes the new size.
Three Questions That Decide the Route
- How much donor fat do you have? Fat transfer needs harvestable fat somewhere on the body. A very lean patient may not have enough for a meaningful increase.
- How much volume do you need in one session? A single fat-transfer session has a practical ceiling. An implant delivers its full labeled volume at once.
- How do you feel about a long-term device? An implant needs ongoing checks and may need future surgery. Fat that survives becomes part of the breast.
Turning a Cup Size Into Measurable Goals
What does a C cup describe on your chest? For many patients it names a look: more fill through a shirt, a rounder upper slope, a proportion that matches the torso. The letter is shorthand between you and the surgeon. Bra labels work like clothing sizes across brands. A medium at one maker can be a small at another, and the tag still does not tell anyone where the seam should sit.
Bra sizing varies by manufacturer, band circumference, breast shape, implant profile, and how much of your own tissue you started with, so a surgeon cannot promise an exact postoperative cup. A peer-reviewed study indexed in PubMed found that patients undergoing augmentation experienced an average increase of two bra sizes, defined as either a cup-size increase or a combination of increased cup size and chest circumference, across different implant volumes.
That spread is why one cup-to-cc chart fails on real bodies. The same volume reads differently once width, projection, and tissue change the silhouette. If you want to see how much sizing language shifts between brands and systems, it helps to compare 36F sizing systems and notice how one letter covers different actual dimensions. Consultation replaces that guesswork with numbers taken from your body.
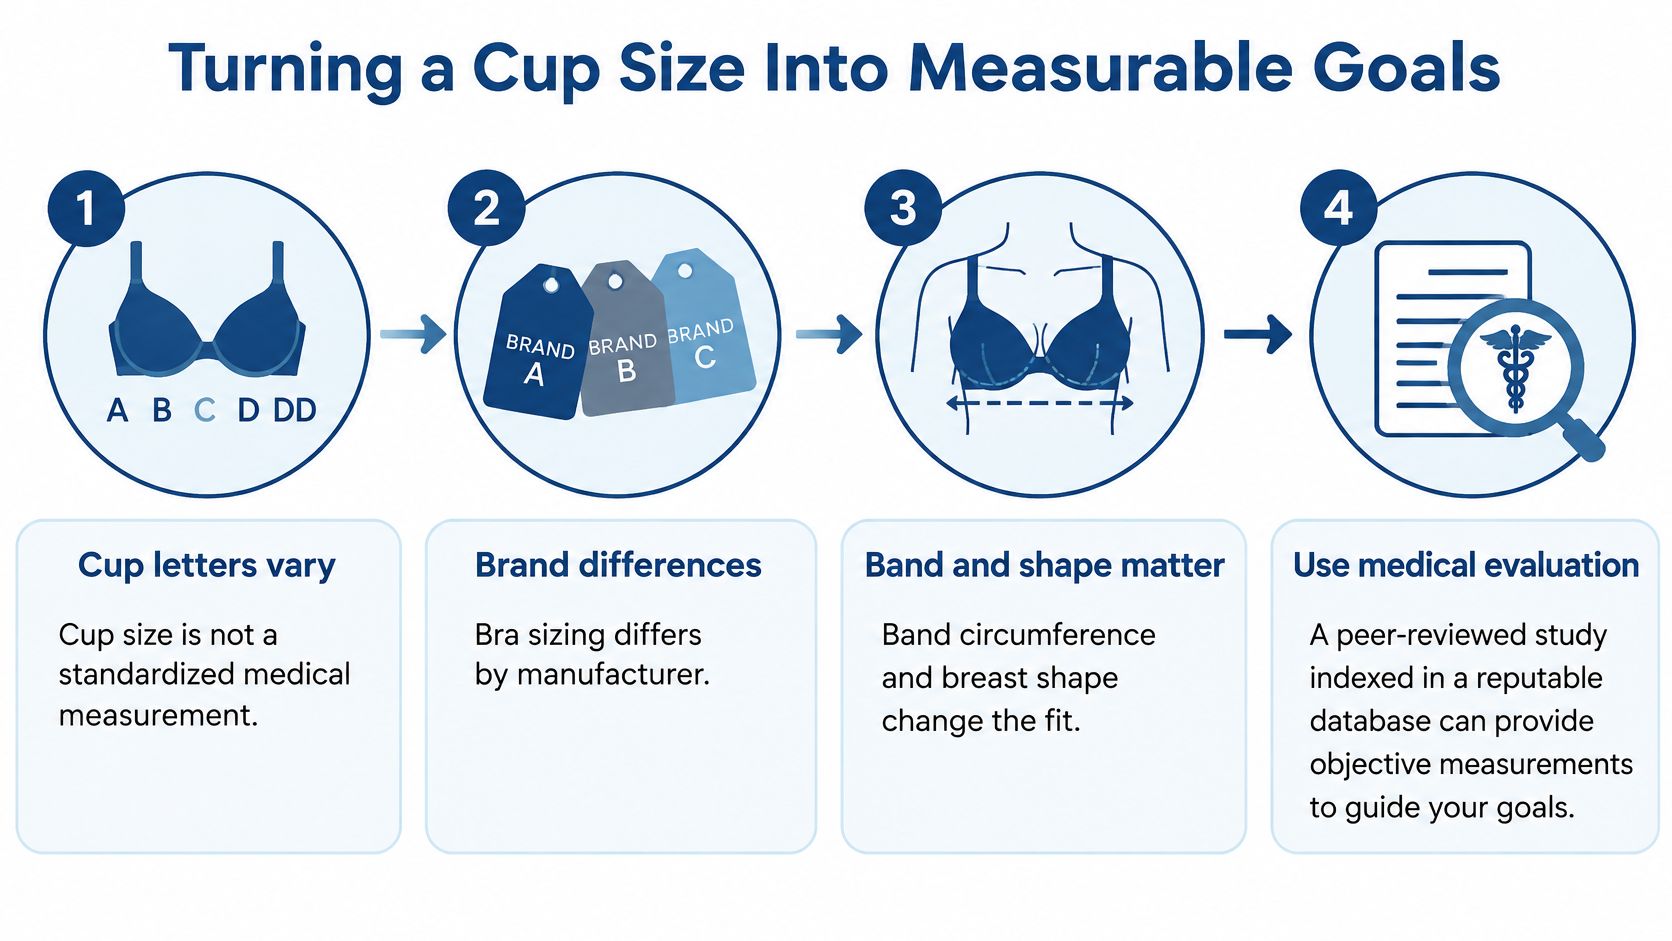
A useful target sounds more like this: fuller upper pole, same chest width, a gentle slope rather than a high round shelf. Those words can be checked against a measuring tape and a photograph. A cup letter cannot.
Six Planning Steps and Why Each Matters
- Record chest width and breast-base diameter. Chest width sets an upper limit on how wide added volume can be. Volume wider than your natural base tends to spill toward the armpit or crowd the center.
- Measure soft-tissue thickness and note nipple position. Thin tissue covers edges and contours less, so shape shows through more easily. Nipple position shows where fullness has to sit relative to the breast you already have.
- Document asymmetry between the breasts. Matched sides are uncommon, and the two breasts may need different volumes to look balanced. Recording the difference before surgery keeps the plan honest.
- Photograph front and side views under one light, at one distance. The photos are a shared baseline for projection and nipple height, not a gallery. Later comparisons only hold if angle, distance, and light stay fixed.
- Define upper-pole fullness and projection in plain words. Say whether you want a gentle slope or a rounder upper breast, and point to photos that show it. A phrase such as "fuller upper pole, same chest width, natural slope" gives the visit a shape to test. Words plus images travel better than a cup letter.
- Simulate volume with external sizers or 3D imaging. Trying volume against your own frame shows proportion in a way a chart cannot. The guide to tips for choosing the right breast implant size walks through how that sizing conversation usually goes.
This sequence turns a letter into width, thickness, symmetry, photographs, and projection. A surgeon can plan around those, measure them again later, and compare them with your result. Keep the letter as the look you are asking for. Let the measurements decide what that look can be.
Fat Transfer Planning and Realistic Volume
Fat transfer can produce a modest, softer enlargement, but it's less predictable than an implant for a full A to C transformation. The numbers show why. A 2024 systematic review and meta-analysis of 35 studies involving 3,757 women found that autologous fat grafting for breast augmentation used an average of 300 mL of fat, with average volume retention of 58% and one-year patient satisfaction of 92%.
Read that retention figure carefully. It means a meaningful share of what goes in doesn't stay, and your surgeon plans around that expectation rather than promising you'll keep everything. High satisfaction alongside partial retention tells you patients often like the natural feel and shape even when the final volume lands below the injected amount. It also means a two-cup goal may need staging rather than one oversized session.

How the Workflow Runs
- Confirm enough donor fat and a stable body weight. Grafted fat behaves like fat elsewhere, so major weight swings after surgery change your result. Stability first makes retention more predictable.
- Complete a baseline breast exam and age-appropriate imaging. A documented starting point protects you later. Any future finding can be compared against what was there before grafting.
- Harvest the fat using a low-trauma technique. Fat cells are fragile, and gentle collection gives more of them a chance to survive the move. Rough handling shows up later as lost volume.
- Process the fat to remove blood, oil, and debris. What gets injected should be clean, viable fat, not fluid that inflates the early result and disappears. This step separates real graft from temporary fullness.
- Inject small parcels in several tissue planes without overfilling. Tiny deposits placed in layers sit closer to a blood supply, which is what keeps them alive. One large bolus starves its own center.
- Reassess after the graft stabilizes before planning a second session. Early volume includes swelling and fat that won't survive. Waiting shows you the true deficit, and our page on fat transfer breast augmentation results shows how outcomes settle over time.
Pitfalls That Lead to Disappointment
The first is expecting every transferred cell to stay. Partial loss is normal biology, not surgical failure. The second is attempting an oversized single session to force a two-cup jump, which raises pressure in the tissue and works against graft survival. The third is failing to record your fat-grafting history for future breast imaging.
That last one deserves emphasis. Fat necrosis or oil cysts can create palpable lumps or findings on imaging that look suspicious without context. With your operative record available, a radiologist can correlate those findings with prior grafting instead of starting from alarm. Keep your records, and tell every future imaging provider about the procedure.
Before you commit, ask your surgeon two things. How will the team measure volume before and after grafting, and how many sessions are typical for a change of this size on a frame like yours? Clear answers to both tell you whether expectations have been grounded in your anatomy.
Implant Route Risks, Consent and Surveillance
A cup letter works like a clothing size you name out loud. It points at a look, while chest width, skin stretch, and photographs decide what volume will sit well. The implant is a separate commitment: a long-term medical device that stays in the body, needs monitoring, and may need another operation later. Before-and-after photos show the early change, not that longer arc.
Federal labeling is built to force that fuller talk before surgery. You review and sign a patient decision checklist with your surgeon before an operating room is scheduled. The FDA breast implants guidance explains that labeling communicates risks through a boxed warning and that checklist, identifies rupture or deflation, infection, pain, changes in nipple or breast sensation, capsular contracture, asymmetry, scarring, additional surgery, and implant removal among possible complications, and describes surveillance for people without symptoms as a first scan 5-6 years after implantation, then every 2-3 years.
Risks Worth Discussing by Name
Rupture or deflation means the shell fails. Sometimes the breast changes shape right away. Sometimes nothing you can see changes at all.
Capsular contracture is scar tightening around the implant. The breast can look distorted and feel uncomfortable.
Nipple or breast sensation can decrease, increase, or shift, and that change may persist.
Asymmetry, pain, infection, and scarring can each need treatment. Some of those problems lead to more surgery, or to taking the implant out.
One rarer risk belongs in the same consent talk. Breast implant-associated anaplastic large cell lymphoma (BIA-ALCL) is a type of immune-system cancer reported in connection with breast implants. Rare does not make it optional. Surface type is part of choosing the device, so ask which surface you would receive and why it fits your plan.
Silicone-gel implants can rupture without a warning you would catch at home: no pain, no shape change, and no symptom. That quiet failure is why imaging continues even when you feel fine, and why the signs of breast implant rupture matter if you already have implants or are considering them.
Implant Imaging Surveillance Schedule
The first row follows the FDA timing named above. New symptoms, or an ultrasound that does not settle the question, move you to MRI on the surgeon's direction.
| Situation | Imaging | Timing |
|---|---|---|
| Asymptomatic patient | Ultrasound or MRI | First scan 5-6 years after implantation, then every 2-3 years |
| Symptoms appear | MRI | As the surgeon directs |
| Ultrasound result is uncertain | MRI | Follow-up as the surgeon directs |
Implants aren't lifetime devices. The longer they stay in place, the greater the chance of a complication that leads to removal or replacement surgery.
A complete consent conversation covers implant type, size, surface, and placement, the change your measurements can reasonably support rather than a letter alone, the surveillance schedule above, and the chance of revision or removal later. A visit that stays on cup size and skips those pieces leaves the decision half finished. The checklist exists so that conversation happens the same way for every patient, before the choice is final.
Recovery Timeline and What to Expect
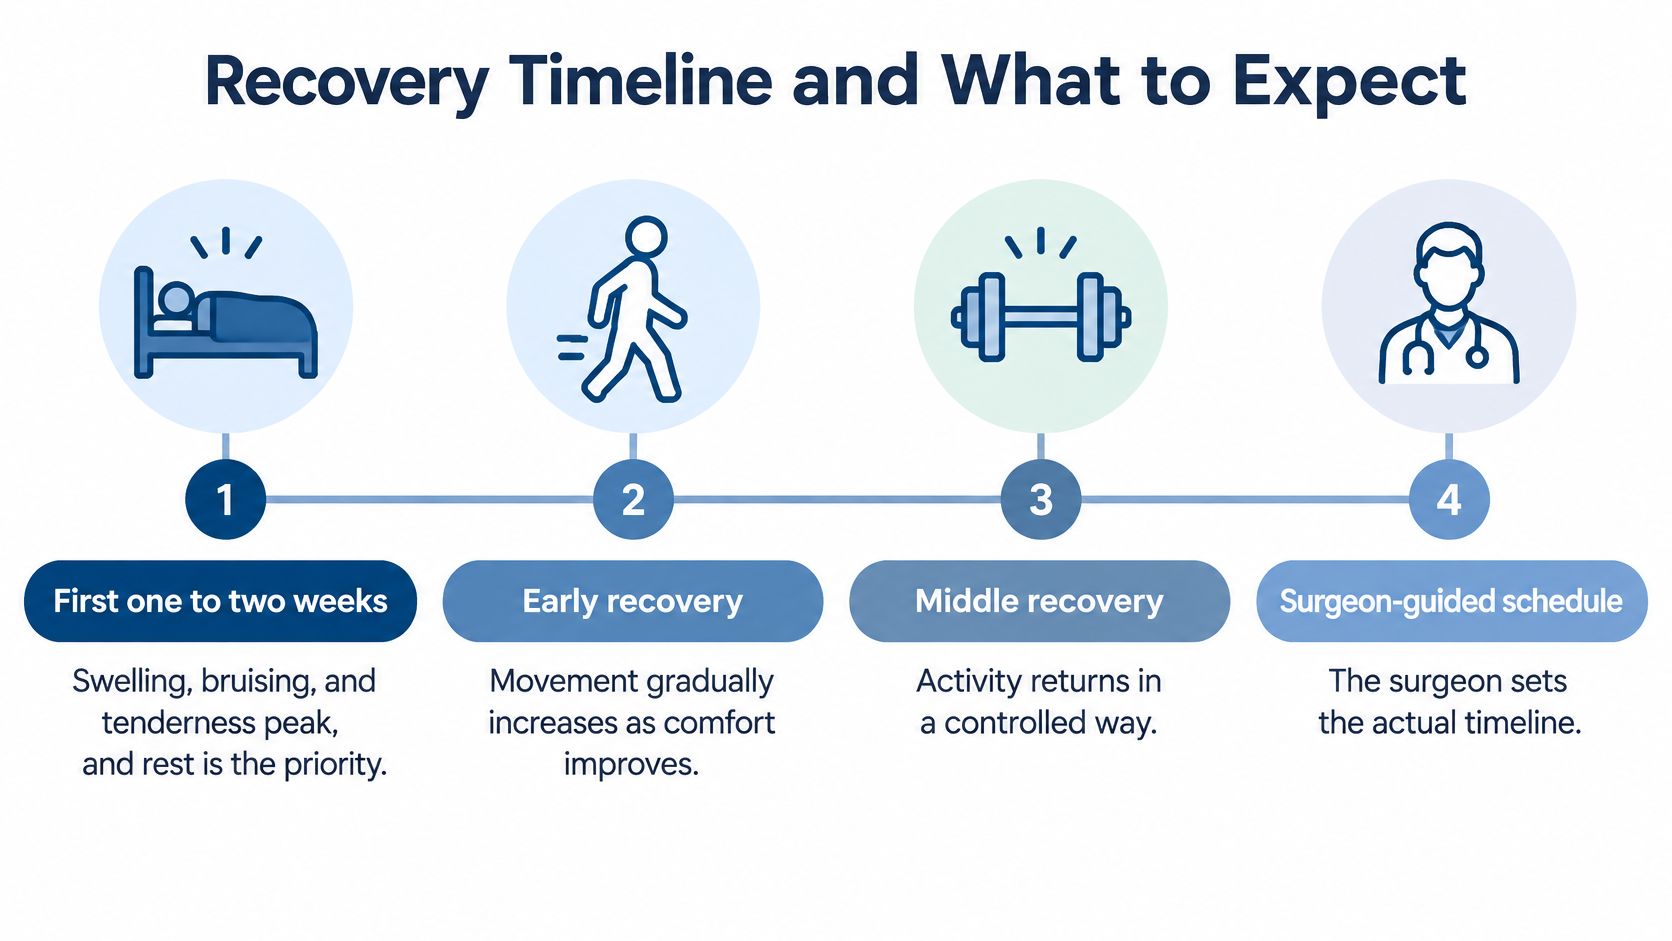
Recovery doesn't move in a straight line from surgery day to final result. It moves in phases, and judging your outcome during the wrong phase causes most of the anxiety we hear about. Your surgeon sets your actual schedule, but the general rhythm looks like this.
Four Phases to Plan Around
- First one to two weeks. Swelling, bruising, and tenderness peak during this window, and rest is the priority. Your breasts will look larger and higher than they'll eventually settle, so don't shop for bras yet.
- Weeks two to six. Many people return to desk work while lifting restrictions remain in place. Early swelling begins to settle, and movement gradually increases as comfort improves, within the limits your surgeon gives you.
- Months three to six. For fat transfer, this is when grafted volume stabilizes. Your surgeon reassesses what stayed before deciding whether a touch-up makes sense.
- Around one year. The final shape becomes clear for either route. Scars have matured, swelling is gone, and what you see is the result you planned around.
That third phase carries an important expectation. The American Society of Plastic Surgeons safety guidance on fat transfer breast augmentation lists cysts, infection, microcalcification, fat-cell necrosis, and migration or loss of some transferred fat cells as potential risks, and notes that patients may require touch-up injections to retain the desired shape. Fat-transfer breast augmentation does not guarantee that all transferred volume will remain, so an A to C plan built on grafting can't be treated as a precise, permanently predictable volume change.
The swelling peak and the final result are two different events. A photo taken at week two tells you almost nothing about month six.
Judge your progress with photos from the same angles, taken in the same light, not with cup labels. Cleavage, upper-pole fullness, and symmetry also change at different rates, so one feature may look finished while another is still settling. Comparing week-to-week photos side by side shows steady progress that a mirror check misses.
Bring two questions to your consultation. How many sessions should you realistically plan for, and what's the touch-up policy if retention falls short of the goal? Hearing those answers before surgery turns the timeline above from a surprise into a plan.
Prepare Your Measurements and Book Consultation
A consultation is more useful when practical details are ready beforehand. Along with the measurements and goal you have already outlined, gather information that helps the surgical consultant discuss your health history, prior care, and possible next steps.
Your Preparation List
- Bring a list of medications, supplements, allergies, and relevant health conditions. Include any questions about how these may affect your options or preparation.
- Gather prior breast imaging reports and records of breast procedures, including any previous fat grafting or implant surgery. These can give the surgeon useful context for discussing your history.
- If you are considering fat transfer, organize photos of possible donor areas, such as the abdomen or flanks. Use clear, consistent views and note any areas you would like to discuss.
- Write down practical questions for the appointment. Ask what information is still needed, which options may fit your goals, and what the consultation process involves.
Ideal Face & Body offers a complimentary virtual surgical pre-screening with its surgical consultant to discuss goals and options. You can use the conversation to ask whether Raise Your Cup® breast fat transfer, breast augmentation with implants, or another breast procedure may be appropriate to discuss further. The practice offers breast augmentation and breast implant revision as well as fat transfer to the breasts.
If you would like to begin online, request a complimentary virtual pre-screening through Ideal Face & Body. Bring your records and donor-area photos to the conversation, and ask what additional information the team needs to discuss your options.