
Swelling, interrupted sleep, and medication questions can make the first days after breast reduction feel harder to interpret than they really are. You may be wondering whether you should walk, shower, sleep differently, or call your surgical team about drainage or uneven swelling. Recovery is progressive rather than linear. One day may feel noticeably better, followed by a day of tighter skin, more fatigue, or renewed discomfort.
An awake or office-based procedure can change the logistics of anesthesia, discharge, and early support, but it doesn't remove the need for incision care, activity restrictions, follow-up, and surgeon-specific clearance. These breast reduction recovery tips focus on the decisions patients make every day, from garment fit and medication timing to sleep, wound monitoring, work, exercise, nutrition, and emotional adjustment. Use them as practical guidance, not as a substitute for the protocol provided by your surgical team.
Above all, don't compare your recovery calendar with another patient's. A symptom that deserves prompt assessment matters more than whether you appear to be healing “on schedule.” Your surgeon should know about worsening pain, bleeding, increasing redness, fever, unusual drainage, or any other concerning change.
Table of Contents
- 1. Wear Your Compression Garment Correctly
- 2. Time Medication Before Pain Peaks
- 3. Protect Sleep Position and Plan Real Rest
- 4. Treat Incisions as Healing Tissue, Not Finished Skin
- 5. Increase Activity in Stages
- 6. Eat and Drink to Support Repair
- 7. Use Follow-Up Visits to Make Decisions
- 8. Support the Emotional Side of Healing
- 8-Point Breast Reduction Recovery Comparison
- Know Your Milestones and When to Call
1. Wear Your Compression Garment Correctly
A prescribed compression garment can support healing tissue, limit movement, and make swelling more manageable. It should feel supportive, not punishing. Excessive pressure can irritate skin, compress sensitive areas, and make it harder to recognize a developing problem.
Many postoperative plans call for near-continuous garment wear during the first 1–2 weeks, followed by daytime wear for several additional weeks as swelling declines. That schedule isn't universal. The extent of tissue removal, incision pattern, swelling, and your surgeon's examination should determine when you reduce wear time.

Make fit and hygiene part of the routine
Choose a front-closing garment if reaching behind your body is uncomfortable. Have multiple garments available so you can rotate them while one is being washed. Use an unscented detergent, rinse thoroughly, and avoid fabric products that may irritate healing skin.
At a postoperative appointment, ask the team to check the fit directly. The band shouldn't roll into an incision, the fabric shouldn't rub the T-junction, and the breasts shouldn't feel numb or excessively compressed. If swelling changes the fit, don't solve the problem by adding a tighter layer without asking first.
- Follow the prescribed schedule: Don't remove the garment for convenience unless your team has explained when breaks are appropriate.
- Inspect the skin: Look for pressure marks, blistering, increasing irritation, or areas of darkening.
- Wash strategically: Keep a clean garment ready so support doesn't stop while the other one dries.
- Transition gradually: Move to daytime-only wear only when swelling and incision condition support that change.
For a broader discussion of the benefits of compression after surgery, remember that breast reduction garments must still match your surgeon's specific instructions. Guidance on compression strategies for combined cosmetic procedures may be useful, but combined procedures can require a different plan.
2. Time Medication Before Pain Peaks
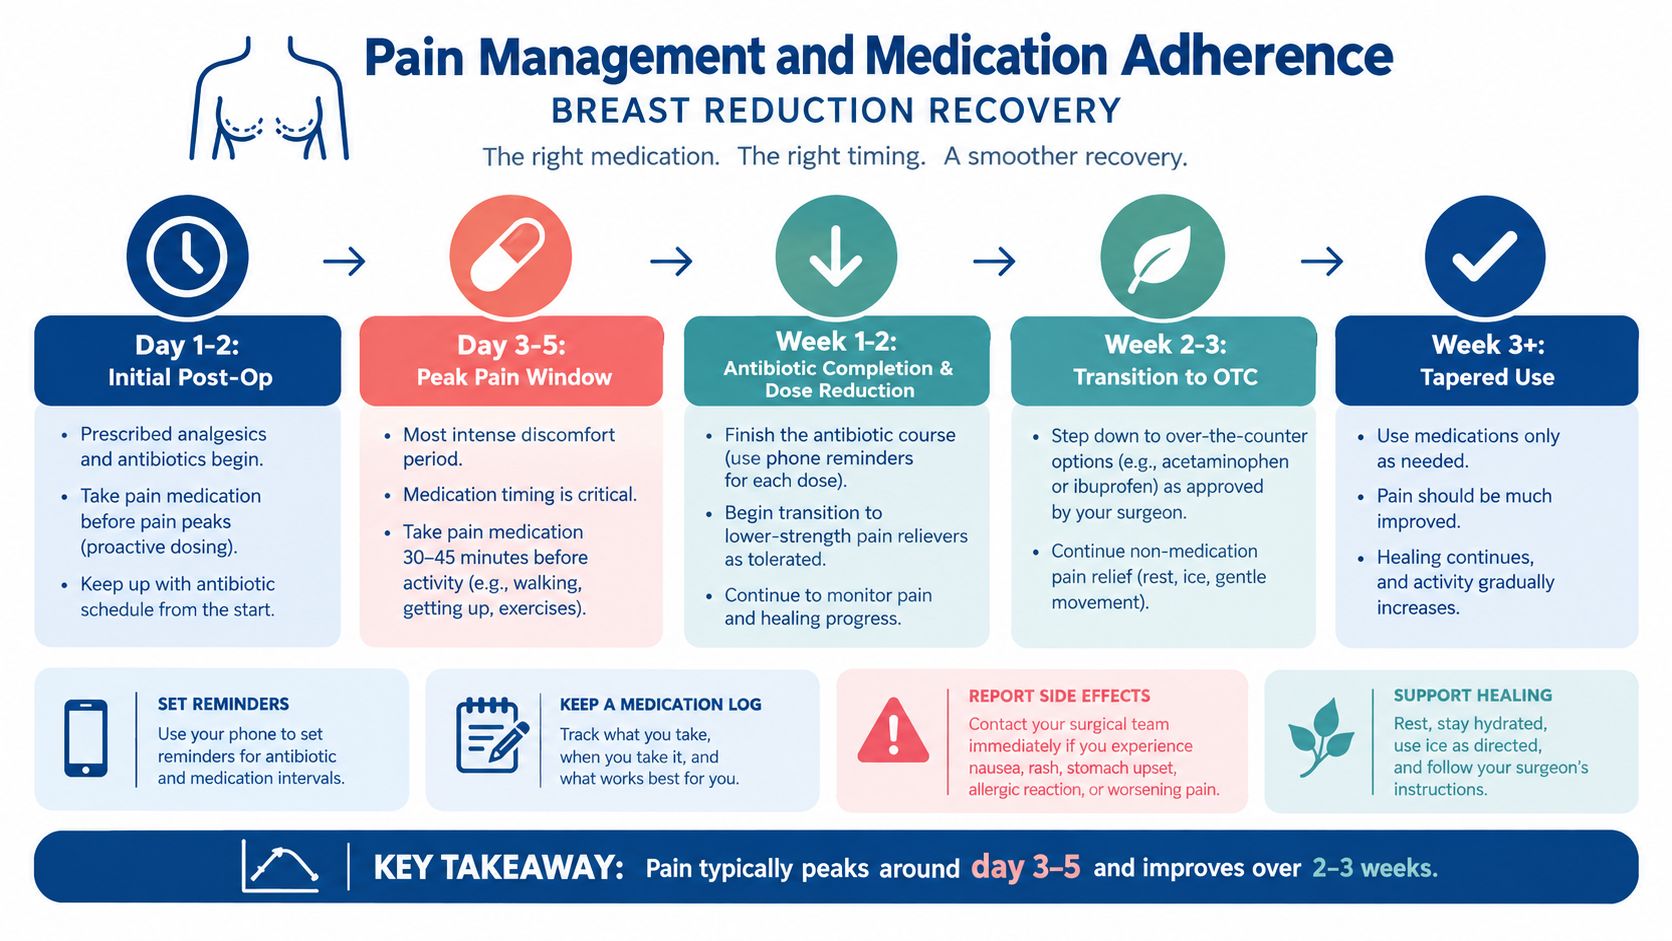
Pain control works better when you follow the prescribed schedule instead of waiting until discomfort becomes severe. Many patients find that the most difficult pain period occurs around days 3–5, with improvement over roughly 2–3 weeks, but your experience may differ according to the operation, tissue removal, medications, and individual sensitivity.
A practical example is a patient who knows that getting up for a shower or attending a wound check usually increases discomfort. If the surgeon has approved the medication, taking it 30–45 minutes before that activity may provide better control than waiting until afterward. Never change the dose or combine medicines unless the surgical team or pharmacist has confirmed that the combination is safe.
Build a medication system
Keep every medication in one visible location, away from children and pets. A phone reminder can help you take antibiotics at consistent intervals when they have been prescribed. A written or digital log should record the medication name, time taken, pain level, nausea, dizziness, constipation, rash, or other effects.
Practical rule: Sedating pain medication and driving don't mix. Don't drive while taking a medicine that affects alertness, or while arm movement and emergency braking remain uncomfortable.
Transitioning to an over-the-counter pain reliever may be reasonable once your surgeon approves it. That decision depends on your medical history and the medicines already prescribed. Some products can increase bleeding risk or interact with other drugs, so “over the counter” doesn't mean automatically appropriate.
Call your surgical team promptly about a concerning side effect, uncontrolled pain, a new rash, repeated vomiting, severe dizziness, or difficulty staying awake. The objective isn't to take more medication. It's to maintain enough comfort to rest, walk lightly, drink fluids, and follow wound-care instructions safely.
3. Protect Sleep Position and Plan Real Rest
Sleep is often interrupted because you can't roll onto your chest, use your arms normally, or find a comfortable position around the incisions. Back-sleeping with support is usually the most practical arrangement. Many recovery plans recommend maintaining it for about 4–6 weeks, though the clearance should come from your surgeon.
Set up the bed before surgery rather than trying to improvise while sore. Place firm pillows under each arm to prevent rolling and reduce pressure on the breasts. Raise your head with 2–3 pillows if that feels comfortable and place another pillow under your knees to reduce lower-back strain.
Remove friction from bedtime
Wear loose, soft sleepwear that won't catch on dressings or press against the incision lines. Keep water, your medication log, and your phone within reach so you aren't repeatedly stretching or pushing yourself upright. If you wake during the night, move slowly and use your legs and core rather than pulling hard with your arms.
Avoid sleeping with your arms overhead or crossed tightly over your chest. A short daytime nap can help when nighttime sleep is fragmented, but extended bed rest isn't the same as recovery. Unless your surgeon has told you otherwise, brief, gentle movement during the day supports a more comfortable routine.
A patient who normally sleeps on her side may find the transition frustrating. Don't force a side position just because it feels familiar. Gradually return to your preferred position only after the incisions are stable and your surgical team approves it. A comfortable position is useful, but protecting healing tissue is more important than reaching a calendar milestone.
4. Treat Incisions as Healing Tissue, Not Finished Skin
Treat every incision as healing tissue, even when the outer skin looks tidy. Wound problems can prolong dressing changes and follow-up. In a retrospective study of 631 reduction-mammoplasty patients, 124 patients, or 19.7%, developed at least one postoperative complication. Most wound separations resolved with dressing changes alone, with an average resolution time of 5.11 weeks and a median of 4 weeks. The published study on postoperative complications shows why a small opening still needs professional monitoring.
Follow your surgeon's cleaning and dressing instructions exactly. Protect the incisions from direct shower spray at first. Do not apply silicone, ointment, massage, or another product to an open or draining area unless your surgical team approves it.
If your reduction was performed awake in an office-based setting, recovery may differ from a hospital-based procedure. Use the same careful incision principles, but obtain individualized clearance from the team that performed your surgery before changing dressings or adding scar products.
Start scar care only after closure
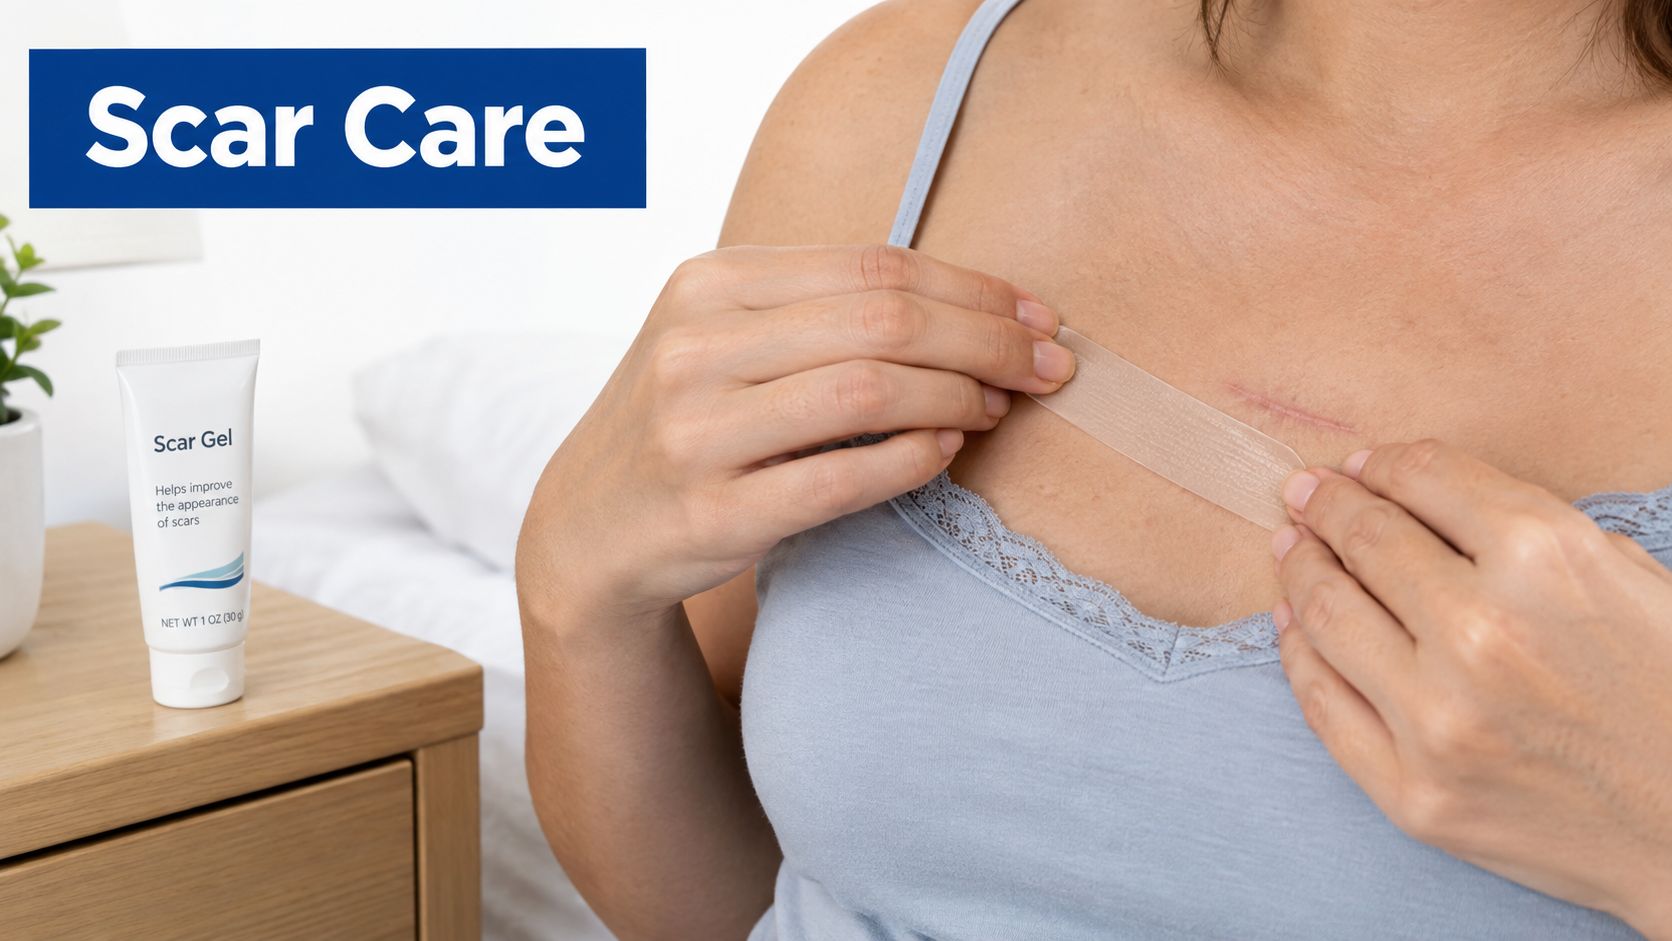
After stitches are removed or the incision has otherwise closed, your surgeon may approve gentle scar massage. Silicone sheets or ointments can begin after the initial healing phase. Once the skin is ready for sunscreen, use broad-spectrum SPF 30+ and keep incisions out of direct sun for at least 3 months.
Scars may mature for 12–18 months, so early redness or firmness does not determine the final appearance. If a healed scar remains bothersome, ask whether laser treatment or microneedling after 3+ months is appropriate. See our best scar healing treatments guide for product and timing options. A guide to wound care explains general principles but cannot replace an examination.
Contact your clinical team promptly for increasing redness, fever, foul drainage, rapidly worsening pain, darkening skin, breast swelling, or wound separation. Do not self-treat suspected infection or drainage.
5. Increase Activity in Stages
The safest activity plan begins with light movement and adds demand only after the incisions and your symptoms support it. A published surgical-outcomes protocol described a conservative progression of about 30% of normal activity during the first 2–3 weeks, driving at about 2 weeks when comfortable, longer walks around 4 weeks, work resumption around 8 weeks, and contact sports or high-intensity exercise at approximately 12 weeks. The surgical protocol and recovery data show why these milestones should guide discussion, not replace clearance.
Memorial Sloan Kettering Cancer Center advises avoiding objects heavier than 5–10 pounds, or 2.3–5.4 kilograms, for 4–6 weeks, and avoiding running, jogging, or jumping for 6 weeks. Its breast reduction recovery guidance also makes clear that lifting restrictions affect groceries, laundry, childcare, and household tasks, not only gym sessions.
Use a staged plan
- Weeks 1–2: Keep activity to gentle walking and light daily tasks. Avoid lifting more than 5 pounds unless your surgeon gives a different limit.
- Weeks 3–4: Increase walking duration gradually and add light stretching only if approved.
- Weeks 5–6: Progress toward light cardio and modified upper-body activity when directed.
- After the early restriction period: Delay running, jumping, chest exercises, and heavy strength training until your surgeon clears them.
University of Michigan guidance permits light lower-body exercise after 2 weeks but recommends waiting a full 6 weeks before upper-body exercise. The postoperative exercise guidance illustrates the important distinction between moving your legs and loading healing breast tissue.
Unusual pain, bleeding, sudden swelling, or pulling at the incision means you should stop and contact the surgical team. Don't use feeling energetic as permission to resume your previous routine.

6. Eat and Drink to Support Repair
Your body needs sufficient fuel to repair incisions, maintain immune function, and restore energy. Appetite may be poor after an awake procedure or while taking pain medication, so make meals easy to prepare before surgery. Smaller, frequent meals can be more tolerable when nausea is present.
A commonly used recovery target is 1.2–1.6 grams of protein per kilogram of body weight daily, alongside protein-rich foods such as eggs, yogurt, fish, poultry, tofu, beans, and lentils. Vitamin C sources such as citrus, berries, and leafy greens support collagen formation, while lean meats, legumes, and nuts provide zinc. Iron-containing foods may also matter when your clinician has identified a need for them.
Keep the plan practical
- Prepare protein first: Add a protein source to each small meal rather than trying to consume everything at dinner.
- Keep fluids nearby: Aim for at least 8–10 glasses of water daily unless your clinician has given you a fluid restriction.
- Choose easy foods: Soups, smoothies, soft fruit, oatmeal, and prepared meals can help during nausea or fatigue.
- Avoid excess: Large amounts of sugar and heavily processed foods may make it harder to maintain a balanced recovery diet.
- Check supplements: Take vitamins or supplements only as prescribed or recommended, because some can interact with medication or affect bleeding.
Nutrition can't compensate for smoking, poor wound care, or returning to strenuous activity too soon. If you have diabetes, kidney disease, digestive problems, food allergies, or another condition affecting diet, ask your clinician for an individualized plan. The nutrition guidance for improving surgery outcomes can help you organize food choices before and after the procedure.
7. Use Follow-Up Visits to Make Decisions
Follow-up isn't a formality. The surgical team can distinguish expected firmness, bruising, uneven swelling, or numbness from a hematoma, infection, seroma, wound problem, or tissue compromise. That distinction often can't be made reliably from a phone description or a photograph alone.
Many postoperative schedules include appointments around 1–2 weeks, 6 weeks, 3 months, and 6 months. Your own schedule may be more frequent, particularly if you have delayed healing, significant medical conditions, smoking history, diabetes, higher body mass index, or prior radiation. A 2025 surgical review identifies BMI of at least 30, smoking, diabetes, and prior radiation as meaningful risk factors for delayed healing and other complications. The review of breast reduction recovery considerations supports risk-adjusted planning rather than a single standard calendar.
Arrive prepared
Keep a short daily record of pain, sleep, medication effects, drainage, swelling, temperature if advised, and activity. Bring photographs that show changes over time if your team has asked you to document healing. Photos don't replace an examination, but they can help the clinician understand when a change began.
Prepare questions before each visit:
- Work: When can you safely resume your specific duties?
- Driving: Can you move your arms comfortably and react quickly without sedating medication?
- Garments: Is the fit still appropriate as swelling changes?
- Wounds: Is a small open area, lump, or drainage pattern expected?
- Exercise: Which movement can you add now, and which remains restricted?
- Scar care: Is the incision ready for massage, silicone, or sun protection?
Contact the team immediately about fever, increasing redness, discharge, rapidly worsening pain, progressive one-sided swelling, or bleeding. Don't postpone a scheduled appointment because you feel mostly well, and don't wait for the next appointment if a new warning sign appears.
8. Support the Emotional Side of Healing
Physical healing and emotional adjustment don't always move together. You may feel relieved about reduced breast weight while also feeling anxious about swelling, bruising, numbness, asymmetry, or the early shape. A difficult morning doesn't necessarily mean the result is failing.
A systematic review of 95 studies including 9,716 patients found a mean overall satisfaction rate of 90.26%. The same review reported bodily-pain improvement on the SF-36 ranging from 22.34% to 83.33%, physical quality-of-life gains of 10.38%–33.24%, and psychological gains of 3.33%–33%. The systematic review of patient-reported outcomes shows why recovery should be judged through pain, sleep, activity, emotional well-being, appearance, sensation, and satisfaction, not a single early mirror check.
Replace comparison with documentation
Avoid comparing your progress with another patient's photographs or timeline. Surgical technique, tissue removal, medical history, skin quality, wound behavior, and activity demands all affect recovery. Instead, keep a journal that records small milestones, such as sleeping longer, walking farther, needing less medication, or completing a routine task comfortably.
Ask trusted friends or family members for practical help and emotional support. If you live alone, arrange assistance with groceries, laundry, transportation, and childcare before the procedure. An awake, office-based experience may allow a different discharge process, but it doesn't guarantee that you'll feel ready for every normal responsibility immediately.
Recovery isn't a straight line. A temporary dip in comfort doesn't erase the progress your body has already made.
Final breast shape, swelling, sensation, and scars can continue changing over 6–12 months. Contact your surgical team if sadness, anxiety, distress about your appearance, or other emotional symptoms feel intense, persistent, or difficult to manage. Emotional support is part of safe recovery, not an admission that something has gone wrong.
8-Point Breast Reduction Recovery Comparison
| Item | Implementation complexity | Resource requirements | Expected outcomes | Ideal use cases | Key advantages |
|---|---|---|---|---|---|
| Compression Garment Wear and Timing | Low–Medium, requires correct fit and adherence | Medical-grade garments, multiple sets, surgeon fitting | Reduced swelling, better contour, increased comfort | Early post-op swelling control and contouring | Improves lymphatic drainage and supports tissue healing |
| Pain Management and Medication Adherence | Medium, timed dosing and side-effect monitoring | Prescription analgesics/antibiotics, reminders, medication log | Effective pain control, faster activity tolerance, infection prevention | Acute pain window (days 1–5) and first 2–3 weeks | Prevents pain escalation and enables restful recovery |
| Sleep Position Modifications and Rest Optimization | Low, behavior change and pillow setup | Support pillows, elevated bedding, sleepwear | Less pressure on incisions, reduced overnight swelling | First 4–6 weeks post-op for incision protection | Improves sleep quality and lowers risk of pressure-related complications |
| Wound Care and Scar Management | Medium, stepwise protocols and long-term adherence | Dressings, silicone products, sunscreen, possible clinic treatments | Fewer infections, improved long-term scar appearance (12–18 months) | Patients focused on scar minimization and infection prevention | Non-invasive scar improvement and complication prevention |
| Activity Restrictions and Gradual Return to Exercise | Low–Medium, staged restrictions and progress tracking | Guidance plan, gradual exercise tools, possible physiotherapy | Reduced risk of hematoma/seroma and safe return to activity | Active patients and those in physically demanding jobs | Protects healing tissue and enables confident, safe resumption of exercise |
| Nutrition and Hydration for Tissue Healing | Low, dietary adjustments and tracking | Protein-rich foods, vitamins (C, A), minerals, hydration | Faster tissue repair, reduced inflammation, better scar quality | Patients needing optimized recovery or with poor baseline nutrition | Enhances immune response and supports collagen formation |
| Follow-up Appointments and Surgeon Communication | Low, scheduling and attentive reporting | Clinic visits, travel, photo documentation, direct contact | Early complication detection and personalized recovery plan | All patients for routine monitoring and milestone assessment | Ensures professional oversight and tailored guidance |
| Emotional Support and Realistic Expectations Management | Low, counseling and social support | Support network, counseling resources, education materials | Improved coping, reduced dissatisfaction, steadier recovery | Patients experiencing anxiety, mood changes, or expectation concerns | Builds realistic outlooks and improves overall recovery experience |
Know Your Milestones and When to Call
A useful breast reduction recovery plan has four priorities. First, protect the incisions and control discomfort during the early phase. Wear the prescribed garment, take medication as directed, sleep in a supported position, and keep your daily tasks light. Second, monitor the wounds rather than assuming every change is either normal or dangerous. Small areas of separation, firmness, drainage, uneven swelling, and numbness may occur, but only your surgical team can determine whether a specific finding needs treatment.
Third, add movement gradually. Light walking is different from lifting, pushing, pulling, running, jumping, or upper-body strength work. A patient may feel energetic before the deeper tissues are ready for strain. Use the timeline from your surgeon as the controlling plan, especially if you had an awake, office-based breast reduction, a larger tissue removal, a physically demanding job, or a medical condition that can slow healing.
Fourth, treat follow-up as part of the procedure. At each visit, discuss work, driving, garment fit, wound changes, sleep, medication effects, and exercise. Recovery counseling should also include more than a pain score. Track sleep, activity tolerance, physical function, appearance, nipple sensation, mood, and satisfaction so your team can identify persistent limitations and adjust advice.
Call the surgical team promptly if you develop fever, increasing redness, new or worsening discharge, unusual or rapidly worsening pain, bleeding, progressive one-sided swelling, darkening skin, wound separation, foul drainage, calf pain, chest pain, or shortness of breath. Don't wait for a routine appointment when symptoms are escalating. Don't self-treat a suspected infection, hematoma, seroma, or tissue problem with extra compression, unapproved medication, or scar products.
Patients considering an awake breast reduction at Ideal Face & Body should receive individualized postoperative instructions from Dr. Justin Yovino and the care team through the Ideal Face & Body website. The right recovery plan accounts for the procedure, your health, your work, your support at home, and what the surgeon sees at each examination.
Ideal Face & Body offers awake, office-based breast reduction and related aesthetic procedures under the leadership of Dr. Justin Yovino, with care planning centered on individualized recovery guidance. Visit Ideal Face & Body to learn about the procedure, postoperative expectations, and how to arrange a consultation.