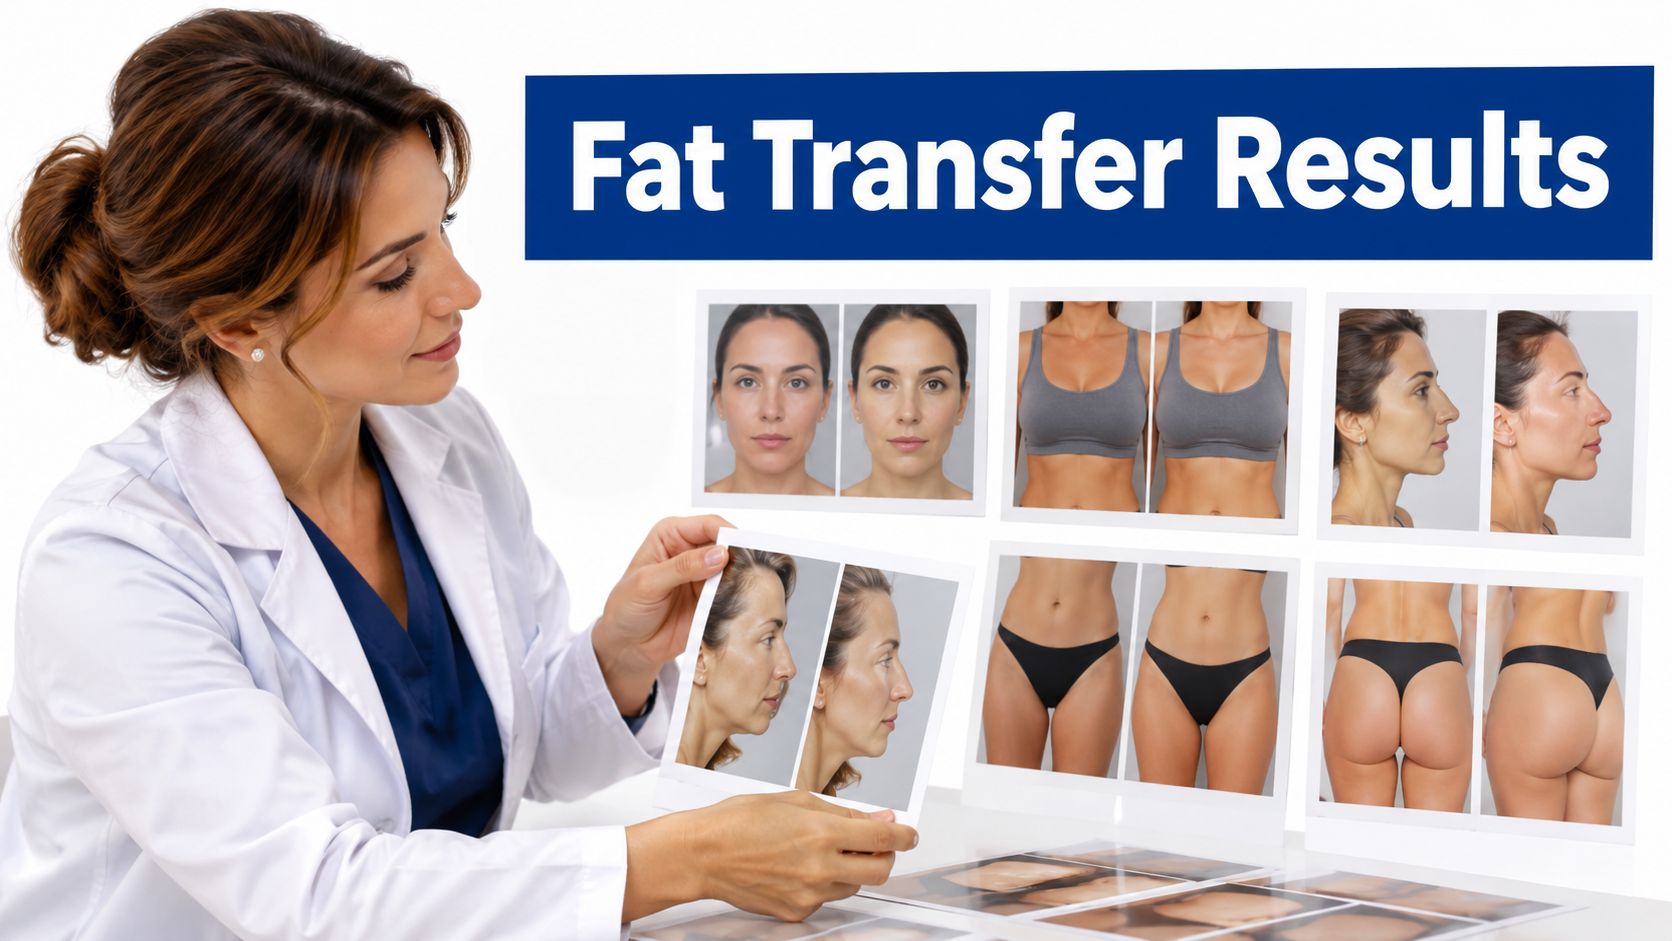
You're comparing fat transfer before and after galleries, trying to decide whether the softer waist or fuller cheeks reflect a surgical change or better photography. One patient stands straight under even lighting. Another arches her back, turns toward the camera, and appears noticeably fuller. Two photos taken a week apart can tell very different stories, especially when swelling is still present.
Fat transfer creates an immediate volume change, but the appearance evolves as swelling resolves and some transferred fat is absorbed. A dramatic early photograph isn't necessarily stronger evidence than a subtle, well-documented result after healing. The photograph's timing matters as much as its angle.
An honest comparison should let you separate added volume from posture, donor-area liposuction, makeup, and lighting. It should also identify whether another procedure contributed to the result.
Practical rule: Trust a repeatable comparison more than a flattering photograph.
For each body area below, look for the contour being treated, the views that reveal it, and the recovery changes that can temporarily exaggerate improvement. You don't need photography expertise. You need matching conditions and enough information to understand what happened between the pictures.
Table of Contents
- 1. Breast Fat Transfer (Raise Your Cup) Before-and-After Results
- 2. Buttock Fat Transfer (Brazilian Butt Lift and Awake Butt Lift) Before-and-After Results
- 3. Hip Dip and Flank Fat Transfer Before-and-After Results
- 4. Midface and Cheek Fat Transfer Before-and-After Results
- 5. Tear Trough and Periorbital Fat Transfer Before-and-After Results
- 6. Hand Fat Transfer (Hand Rejuvenation) Before-and-After Results
- 7. Thigh and Calf Fat Transfer Before-and-After Results
- How the seven fat transfer areas compare
- Turn Any Gallery Into a Fair Comparison Before You Decide
1. Breast Fat Transfer (Raise Your Cup) Before-and-After Results
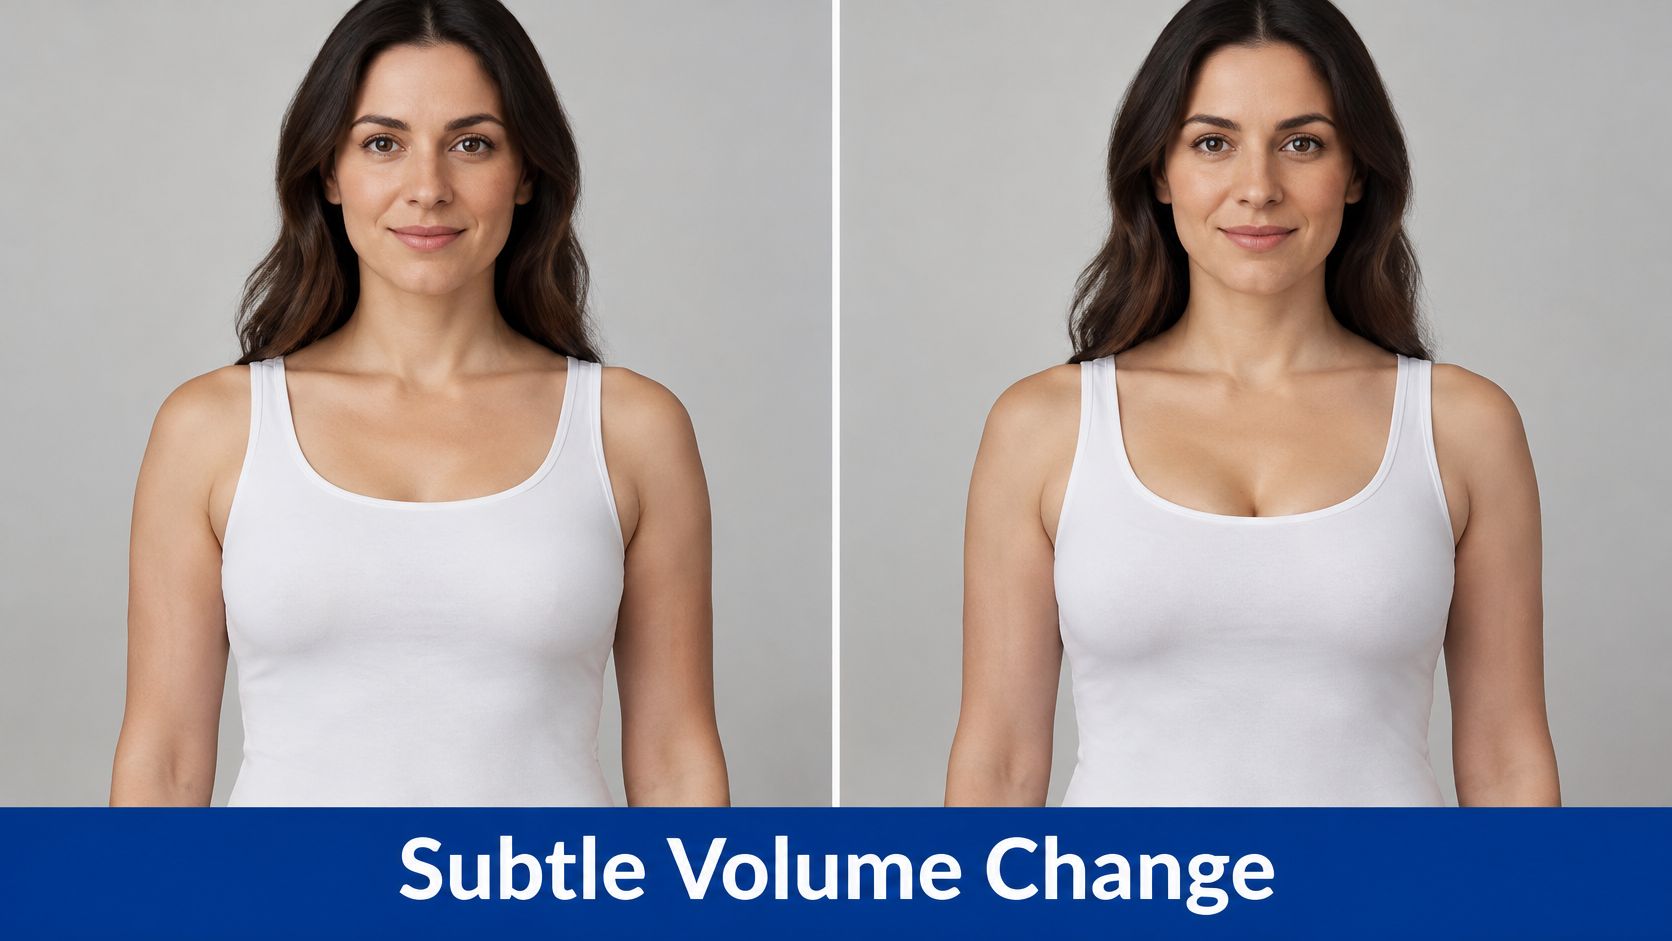
Breast fat transfer uses your own fat, harvested with liposuction and processed before reinjection, to improve fullness and contour. A typical use case is a flattened upper breast after weight change, where the desired improvement is a softer chest-to-breast transition rather than a dramatic enlargement.
Check fullness without confusing it with lift
Compare frontal, oblique, and side views with the arms in the same position. Raised arms, pulled-back shoulders, and different camera heights can change how the upper breast and cleavage appear. Side views help distinguish added projection from a change in posture.
Fat adds volume; it doesn't reliably correct substantial breast drooping. If the nipple position changes considerably, check whether a breast lift was also performed.
- Volume expectations: A systematic review of breast fat transfer reported average retention of 58%, with study results ranging from 44% to 83%. That isn't a personal survival-rate guarantee.
- Donor availability: Establish whether enough suitable fat is available without over-treating the donor area.
- Recovery preparation: Avoid smoking before and after surgery, disclose nicotine use, and follow the surgical team's cessation instructions.
Photographs can't reveal every complication. A review in Plastic and Reconstructive Surgery describes postoperative findings such as fat necrosis and calcification. Tell future breast-imaging clinicians about your procedure, and have new lumps assessed rather than assuming they're normal graft changes.
2. Buttock Fat Transfer (Brazilian Butt Lift and Awake Butt Lift) Before-and-After Results
A narrower waist can make the buttocks appear larger even before you account for transferred fat. Read a buttock comparison as two changes, donor-area contouring and added buttock volume, rather than attributing everything to injection.
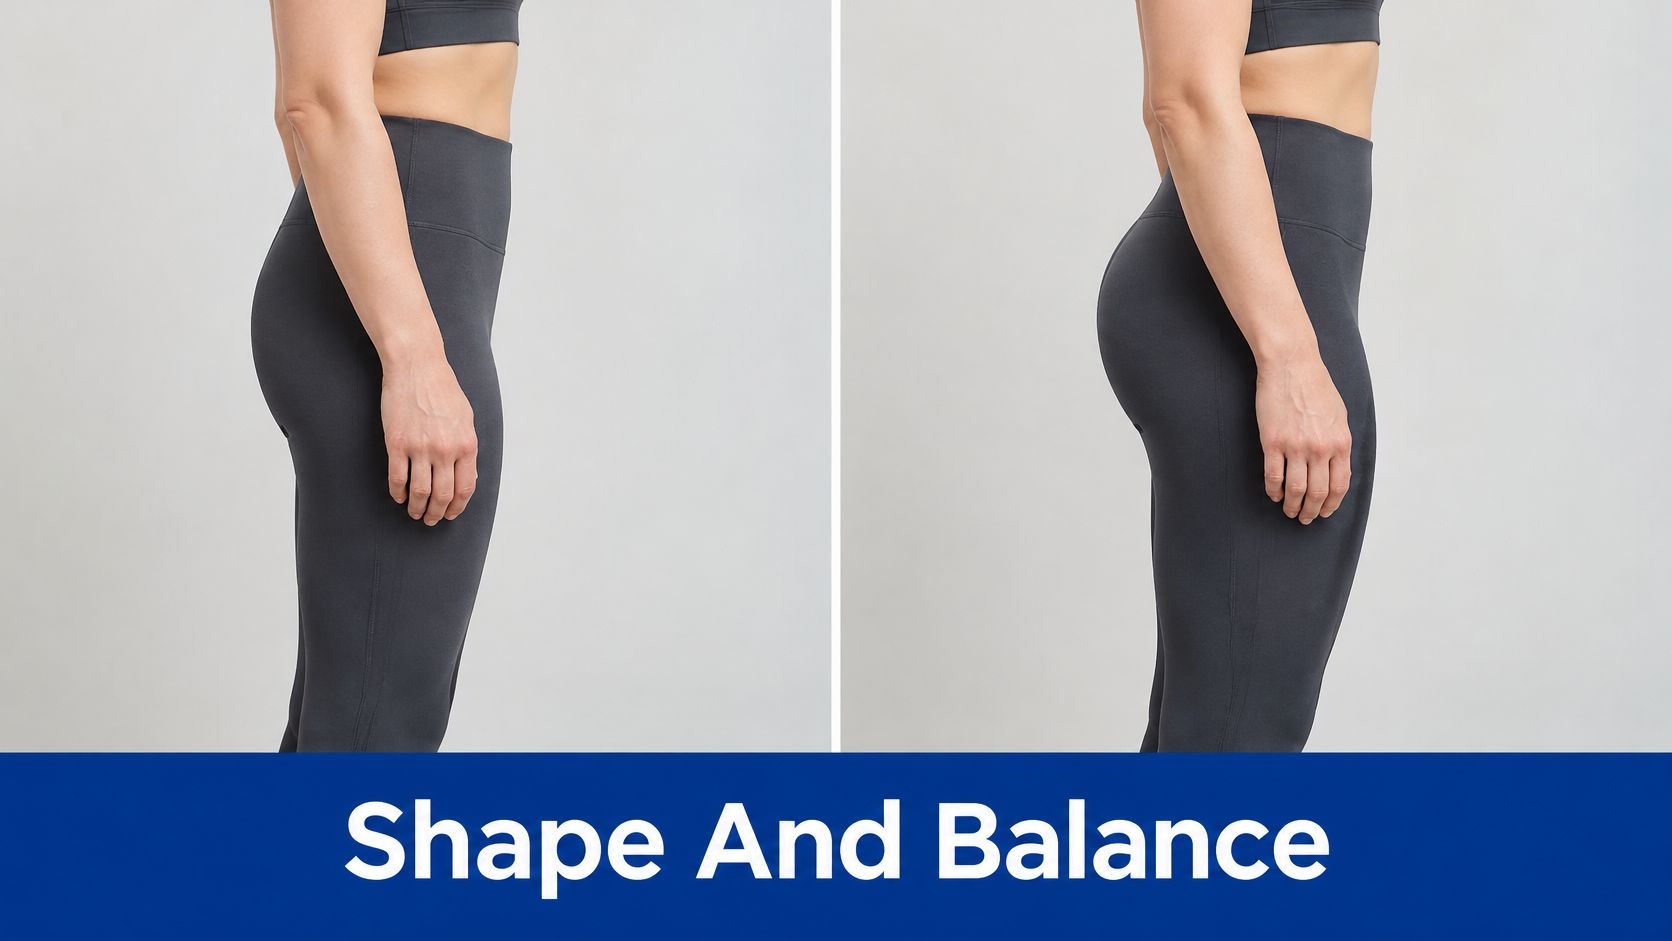
For a flat upper buttock, the useful after-image shows improved upper fullness and projection with the pelvis held neutrally. A rear view should confirm symmetry and the waist-to-hip transition. Arching the lower back, rotating a hip, or shifting weight onto one leg makes the comparison less reliable.
A good shape doesn't establish safety
A QUAD A analysis published in Aesthetic Surgery Journal recorded four deaths among 46,244 reported fat-grafting procedures, with all reported deaths following gluteal augmentation. Those facility-reported figures aren't an individualized risk estimate, but they explain why appearance alone isn't enough.
Discuss subcutaneous-only placement, protection of the gluteal muscle fascia, and how the surgeon verifies the injection plane. A systematic review indexed by PubMed associated ultrasound guidance and subcutaneous-only approaches with lower complication rates, without establishing that either eliminates risk.
The Awake Butt Lift approach emphasizes local anesthesia. Being awake doesn't replace these anatomical safeguards.
Follow individualized instructions for sitting, sleeping, and activity rather than copying another patient's routine. Sudden breathlessness, chest pain, or collapse requires emergency care. For longer-term planning, our guide to how long BBL results last addresses the distinction between early fullness and a maintained result.
3. Hip Dip and Flank Fat Transfer Before-and-After Results
Hip dips aren't automatically a defect or an excess-fat problem. The inward curve along the outer hip partly reflects underlying anatomy. Fat transfer can soften that transition, but it can't redesign the pelvis or guarantee a completely straight outer-hip line.
Consider someone with a pronounced lateral hollow and fullness above it at the flank. A smoother after-image may reflect both filling the hollow and reducing the adjacent bulge. Without knowing which areas were treated, you can't judge the contribution of either procedure.
Follow the outer contour, not the pose
Start with a relaxed rear view and matching oblique views, then use the side view to assess overall balance. Keep the feet, knees, and weight distribution consistent. Turning the thigh outward or pushing one hip sideways can change the apparent depth of a dip.
- Trace the transition: Look from waist to outer hip to upper thigh, rather than inspecting the hollow in isolation.
- Check both sides: Improved symmetry matters more than a perfectly straight silhouette.
- Identify donor treatment: Flank liposuction can create a stronger waist indentation even when the hip-volume change is modest.
- Keep clothing consistent: Waistbands and tight underwear can compress the exact contour you're trying to evaluate.
A softened hip dip can be a successful result even when the underlying indentation remains visible.
Discuss whether the hollow is mainly a soft-tissue deficit or a structural contour before selecting a target. Combining hip and buttock treatment may improve proportion, but filling every depression isn't always desirable.
Early swelling can make the transition look smoother than it will remain. Wait until the tissues settle before deciding whether residual asymmetry needs reassessment, and compare photographs taken at a similar, stable body weight.
4. Midface and Cheek Fat Transfer Before-and-After Results
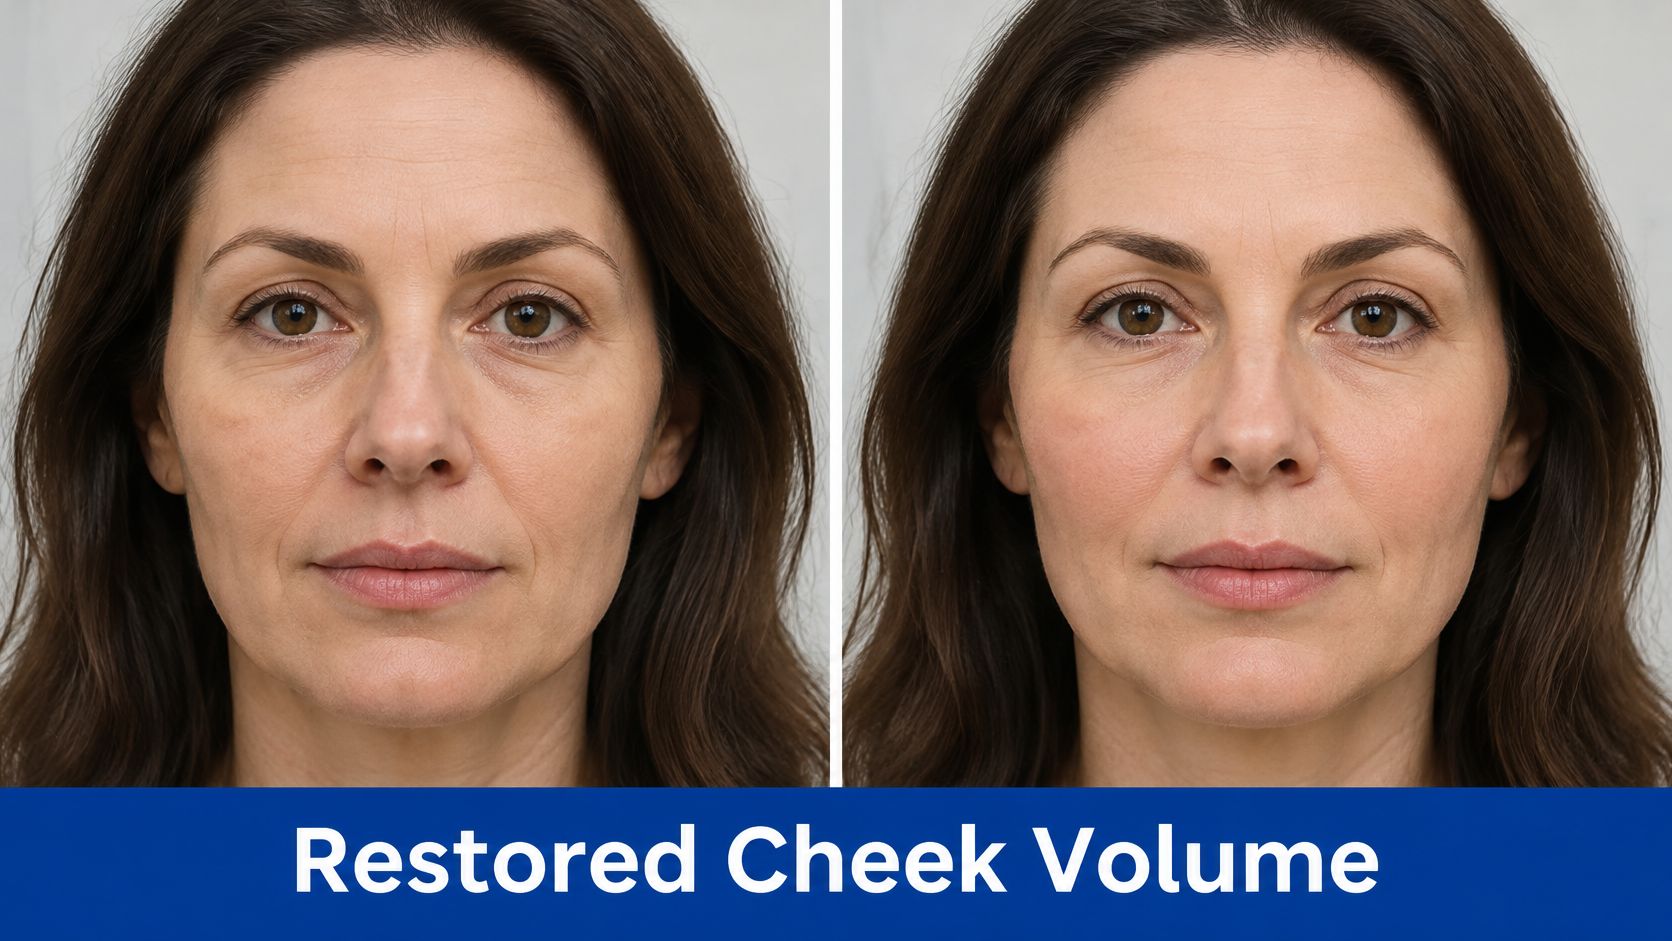
The most useful cheek result isn't necessarily the fullest one. It's the result that restores projection without making the face look heavy or changing the person's familiar proportions.
Facial fat grafting places processed fat into areas such as the cheeks and malar region. For someone with flattened cheeks and deeper nasolabial folds, a realistic improvement may be a fuller midface and softer fold, not complete removal of every line.
Match expression as carefully as lighting
A small smile raises the cheeks and changes the lower-eyelid transition. A chin tilted upward changes shadows beneath the cheekbones. Compare neutral expressions before using smiling photographs as additional evidence.
Frontal views help assess balance. Oblique views reveal cheek projection and hollows, while profiles show how the cheek relates to the nose, lips, and lower face. Our explanation of fat transfer in the face provides additional context for these treatment areas.
Check what else changed between photographs. Makeup, skin resurfacing, a facelift, or treatment of the temples can affect the overall impression without demonstrating a cheek-grafting effect alone.
Fat grafting and dermal filler aren't interchangeable choices. Fat requires harvesting and surgical recovery, while filler may suit someone who wants a more limited, adjustable approach. Neither should be chosen solely because a gallery labels the result natural.
Plan around visible bruising and swelling, and discuss how conservative placement fits your facial structure. An early rounded cheek may reflect edema rather than the volume that will remain. Breast retention percentages shouldn't be used to predict a facial result.
5. Tear Trough and Periorbital Fat Transfer Before-and-After Results
Under-eye photographs are particularly easy to misread. Overhead light deepens a tear-trough shadow, while bright frontal light can largely hide it without changing the underlying hollow.
Fat transfer in the tear trough and surrounding eye area aims to soften the transition between the lower eyelid and cheek. A useful example is a distinct hollow that creates a shadow despite otherwise smooth skin. Successful contour improvement doesn't necessarily remove pigment, visible vessels, or excess eyelid skin.
Separate a hollow from a dark circle
Compare close-ups with the same gaze direction, chin angle, camera distance, and neutral lighting. Concealer, squinting, and a slight smile can each make the under-eye area look smoother. Request a wider facial view as well, so you can assess whether cheek treatment contributed to the change.
- Look at the contour: Is the lid-to-cheek transition smoother, or is the photograph brighter?
- Inspect for excess fullness: A new bulge isn't automatically an improvement over a hollow.
- Clarify the treatment: Lower-eyelid surgery and midface restoration may address different parts of the same concern.
- Allow recovery: Residual swelling can obscure both hollows and small irregularities.
Conservative planning matters: Thin lower-eyelid tissue can make small contour differences visible. More volume isn't always better.
Discuss whether the main problem is volume loss, protruding eyelid fat, skin laxity, pigmentation, or a combination. Adding fat to the wrong problem can leave the original concern unresolved.
Don't judge an under-eye result from a cropped, brightly lit after-image alone. Look for consistent smoothing across neutral frontal and oblique views after healing, without a new ridge or persistent puffiness.
6. Hand Fat Transfer (Hand Rejuvenation) Before-and-After Results
Hold your hands flat, then stretch your fingers and tighten the skin. The veins and tendons look different immediately. That simple change explains why hand-rejuvenation photographs need matched positioning.
Fat transfer restores volume beneath the skin on the backs of the hands. A typical candidate notices thin, bony contours after aging or weight loss and wants less prominent tendons and veins, rather than a different hand shape.
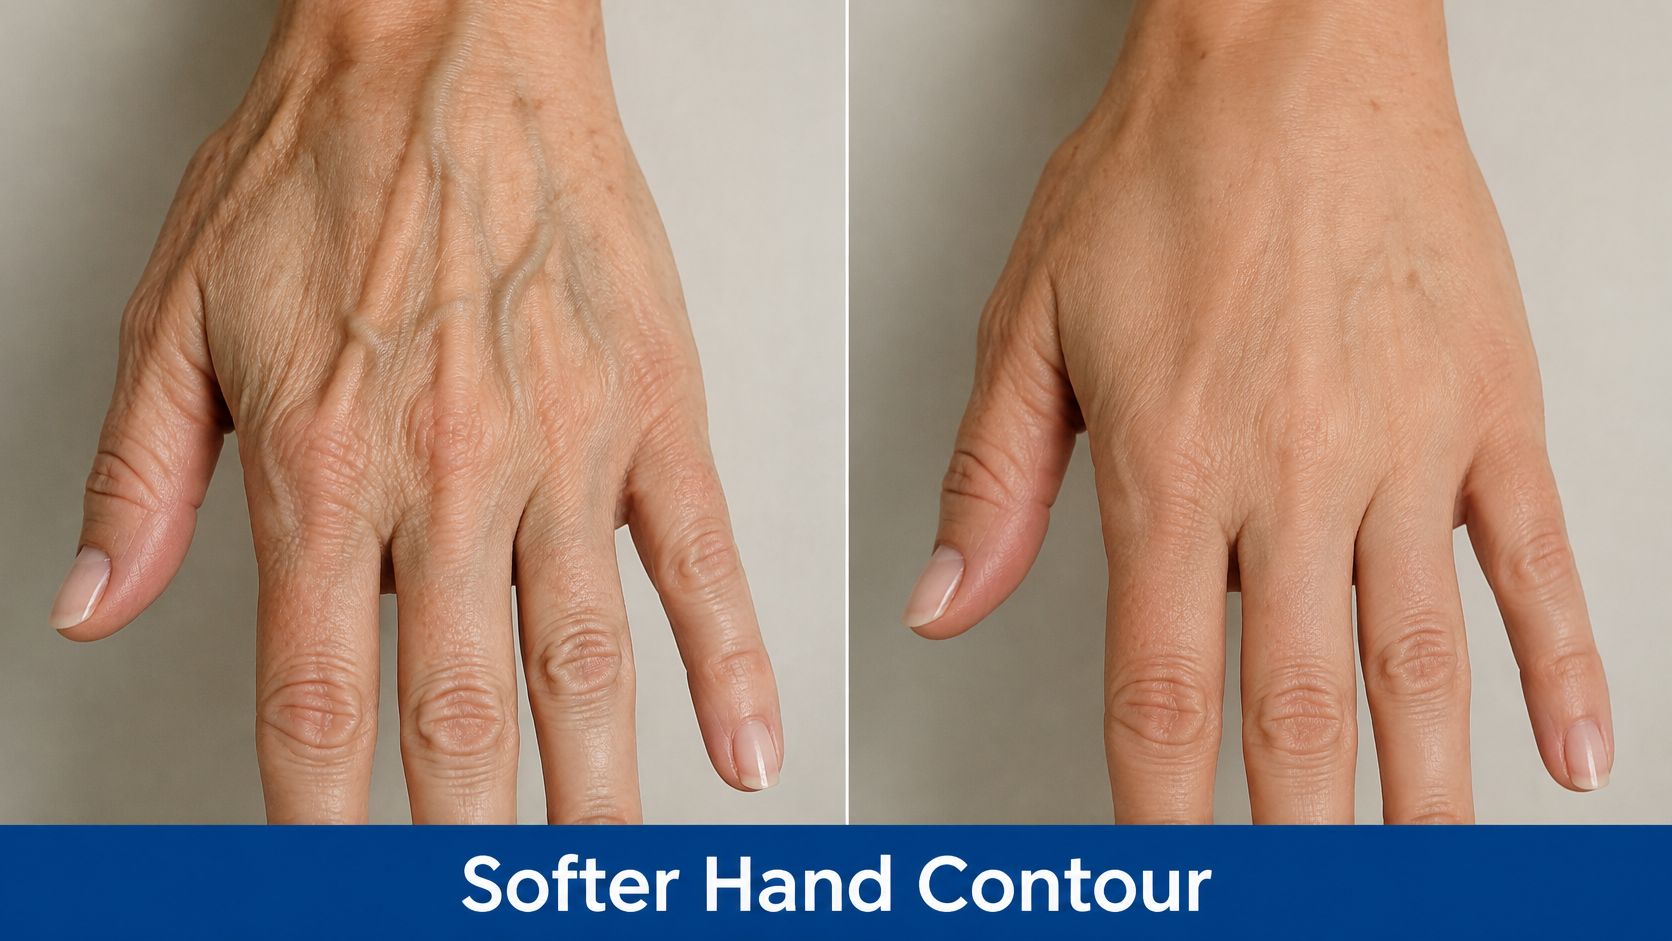
Compare relaxed hands under even light
The after-image should show softer dorsal contours, not just a swollen hand. Check that the fingers are equally relaxed, the wrists aren't bent differently, and both hands rest at a comparable height.
Side lighting can exaggerate tendon shadows. Flat lighting can conceal them. Temperature and hand position also affect vein prominence, so a vein-only comparison is less persuasive than a consistent improvement in overall contour.
- Include both hands: A tightly cropped image can hide differences in distribution or symmetry.
- Separate volume from skin treatment: Added fat doesn't directly erase sunspots or treat every surface-texture concern.
- Plan practical recovery: Temporary bruising and swelling can affect comfort with gripping and routine tasks.
- Protect skin quality: Use sun protection even when the primary treatment addresses volume.
Our overview of hand rejuvenation procedures explains why volume and skin concerns may require different approaches.
For a fair worked comparison, look for a thinner hand with visible tendon grooves before treatment and a gently cushioned contour afterward, with the fingers held the same way. The aim isn't to hide every vein. It's to restore appropriate coverage while preserving recognizable hand anatomy.
7. Thigh and Calf Fat Transfer Before-and-After Results
A close-up can show a smoother indentation while hiding a less balanced leg shape. Full-length standing photographs are essential when evaluating thigh or calf fat transfer.
Targeted grafting can add volume to a flat calf or soften an uneven thigh contour. For example, a localized calf deficit may look better after treatment without creating the sharply defined appearance associated with a larger muscle. Fat changes soft-tissue fullness; it doesn't build muscle.
Read the whole leg before the detail
Request front, side, and rear views with matching foot placement and relaxed knees. Standing on tiptoe contracts the calf, while rotating the feet changes the visible inner and outer contours. Neither belongs in a supposedly matched neutral comparison.
For the thighs, check whether liposuction was performed nearby. Removing fullness beside an indentation and adding fat within it can produce a combined improvement that isn't attributable to grafting alone.
- Assess proportion: Compare calf fullness with the thigh, knee, and ankle rather than pursuing an isolated bulge.
- Check symmetry: Use matching views of both legs, including the transition above and below the treated area.
- Clarify compression: Follow instructions that distinguish donor-site compression from pressure over grafted tissue.
- Maintain stable weight: Surviving transferred fat can change with weight gain or loss.
A successful thigh comparison might show a previously abrupt indentation becoming less noticeable in a relaxed standing view. It doesn't need to show perfectly identical legs, and it shouldn't imply that every contour irregularity can be filled safely.
Swelling can temporarily conceal depressions or exaggerate calf size. Use later follow-up photographs and an examination to decide whether the remaining contour reflects healing, anatomy, or a residual treatment concern.
How the seven fat transfer areas compare
| Item | Treatment Area | Best Photo Angles | Main Limitation |
|---|---|---|---|
| Breast Fat Transfer (Raise Your Cup) | Breasts, especially upper-pole fullness | Matched standing and reclined views | Modest volume gains; some fat may be reabsorbed |
| Buttock Fat Transfer (Brazilian Butt Lift and Awake Butt Lift) | Buttocks, including upper and lateral areas | Side profile and rear views | Results vary; careful technique is essential due to procedure risks |
| Hip Dip and Flank Fat Transfer | Outer hips and upper flanks | Relaxed standing side views | Structural hip dips may show limited improvement |
| Midface and Cheek Fat Transfer | Cheeks, malar region, and sometimes temples | Matched frontal and oblique views | Fat retention is less predictable; touch-ups may be needed |
| Tear Trough and Periorbital Fat Transfer | Under-eye hollows and lower eyelid-to-cheek transition | Consistent close-up views | Delicate area; overcorrection can look puffy |
| Hand Fat Transfer (Hand Rejuvenation) | Back of the hands | Matched views of both hands in consistent lighting | Results may be subtle, and some fat may be reabsorbed |
| Thigh and Calf Fat Transfer | Inner and outer thighs and calves | Full-length standing front, side, and back views | Volume gains may be modest, with swelling that takes time to resolve |
Turn Any Gallery Into a Fair Comparison Before You Decide
A credible fat transfer before and after gallery should help you understand the procedure, not merely admire the after-image. Matched photography, documented timing, and a clear procedure history provide better evidence than dramatic lighting or an unusually favorable pose.
The systematic review in Aesthetic Surgery Journal supports judging breast grafting after adequate healing, commonly around 6 to 12 months, rather than treating immediate postoperative fullness as the durable result. Other body areas require their own clinical assessment. Don't assume every graft follows an identical timetable.
Use this checklist before choosing a result to emulate
- Match the photographs: Request comparable angles, lighting, camera distance, posture, facial expression, and clothing.
- Confirm the timeline: Establish when the after-image was taken and whether it followed the initial treatment or a later grafting session.
- Identify every procedure: Separate the effects of transferred fat, donor-area liposuction, lifting, eyelid surgery, and skin treatments.
- Assess donor limitations: Discuss how much suitable fat is available and what can be harvested without creating a new contour problem.
- Review safety and recovery: Understand graft placement, relevant complications, activity restrictions, and follow-up arrangements.
- Set a realistic endpoint: Define the contour you want, accept partial resorption, and discuss whether staged treatment might be appropriate.
We show prospective patients before-and-after photographs of people who had similar procedures. Bring examples that appeal to you, but explain the specific feature you like, such as a softer upper breast or a smoother hip transition. Another patient's result is a discussion aid, not a promise.
Raise Your Cup® is our name for breast fat transfer, an implant-free approach using your own tissue. Ideal Face & Body no longer offers breast implant placement, implant-based breast augmentation, or breast implant revision procedures. Implant removal and fat transfer are distinct procedures whose suitability depends on your anatomy and goals.
Start with a complimentary virtual surgical pre-screening with our surgical consultant to discuss your goals and options. Bring your preferred photographs, questions about donor areas, and recovery constraints so the discussion stays specific to the change you're considering.
Ideal Face & Body offers fat transfer and awake, local-anesthesia body-contouring options, with before-and-after galleries to support an informed discussion. Visit Ideal Face & Body to arrange your complimentary virtual surgical pre-screening and discuss which photographed changes may be realistic for your anatomy.