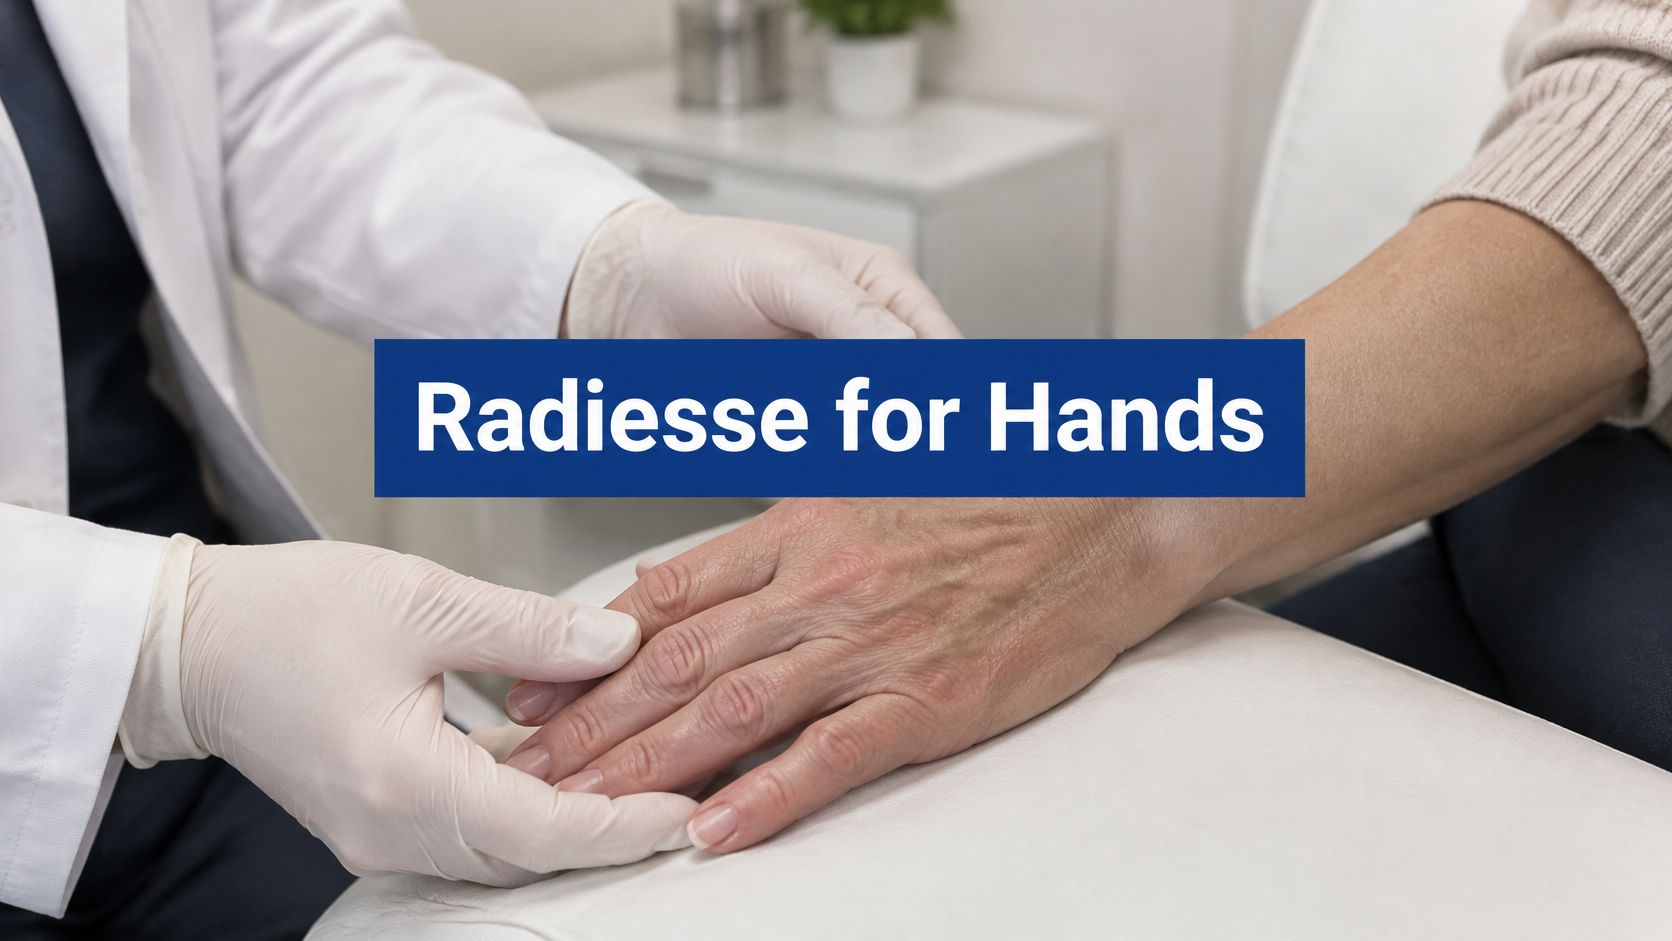
48% of treated patients experienced adverse events lasting more than 14 days that temporarily made activities difficult, according to the FDA clinical review of Radiesse hand augmentation. That's a more useful starting point than a promise of minimal downtime, especially if your day involves typing, driving, lifting, or caring for someone else.
Radiesse for hands can soften the appearance of age-related volume loss, but the decision involves more than how your hands look in photographs. You need to understand what the product treats, how carefully it must be placed, and what recovery could mean for your everyday routine.
Table of Contents
- Approval and Who Qualifies
- Expected Results and How Long They Last
- How the Hand Treatment Is Performed Step by Step
- Risks, Warning Signs and the Recovery Timeline
- Aftercare and Protecting Your Results
- Confirm Your Hand Plan at a Consultation
Approval and Who Qualifies
The U.S. Food and Drug Administration approved Radiesse for hand augmentation on June 4, 2015, specifically to correct volume loss in the dorsum, or back, of the hands, as described in the FDA labeling. The palms aren't included in that indication. Hand augmentation is an approved use, not an off-label extension of a facial filler treatment.
The purpose is to add volume beneath the skin so tendons and veins look less prominent. It doesn't remove those structures or treat the veins themselves. Think of the difference between covering a cord with a thin cloth and placing a cushion over it: the underlying shape remains, but its outline becomes less obvious.
What the product actually does
Radiesse contains calcium hydroxylapatite microspheres suspended in a gel carrier, a composition described in a peer-reviewed clinical study of hand rejuvenation. The gel provides immediate fullness, while the microspheres act like scaffolding that supports a longer-lasting tissue response as the carrier is absorbed.
That distinction matters when you're comparing treatments. Immediate fullness isn't the same thing as the finished result, and an injectable isn't automatically suitable for every concern that makes a hand look older.
General educational resources, such as Wellingborough Dental filler treatments from Wellingborough Dental & Implant Clinic, can help explain the broader category. For a hand-specific discussion, the hand rejuvenation procedures overview provides context for considering volume restoration rather than treating every visible change with filler.
Match the treatment to the concern
The useful question isn't, “Do my hands look older than my face?” It's “Is missing volume the main reason they look older?”
Signs worth assessing include:
- Prominent tendons and veins: Their outlines have become more noticeable as the surrounding tissue has thinned.
- A hollow or bony contour: The backs of the hands look less padded, particularly after aging or weight loss.
- Thin-looking skin over visible structures: A clinician needs to distinguish lack of support from a primarily surface-level skin concern.
- Realistic expectations: You want a softer contour, not a different hand or the disappearance of every crease.
Pigmentation, rough texture, and loose skin need their own assessment. Adding volume shouldn't be presented as a universal solution for all of them.
Candidate check: A good cosmetic match isn't enough. Your ability to accommodate recovery also belongs in the treatment decision.
Postpone treatment if there's active inflammation or infection on or near the hand. Bring unexplained swelling, pain, or a sudden change in appearance to a medical evaluation rather than assuming it's cosmetic aging.
Treatment also isn't the right next step if you expect injections into the palms, want to improve hand function, or can't accommodate bruising, swelling, and temporary difficulty using your hands. People with darker skin types should specifically discuss activity-related recovery, because the FDA review identified greater temporary difficulty in that subgroup.
A consultation should also cover medications, supplements, allergies, previous injectable treatments, and relevant medical conditions. Don't stop prescribed medication on your own to prepare for a cosmetic appointment.
Expected Results and How Long They Last
A hand result is a measured change in contour over months, not a fixed look that stays identical after the first visit.
Radiesse hand results over time
| Timepoint | Measure | Result | Study |
|---|---|---|---|
| 3 months | Improved on Global Aesthetic Improvement Scale | 89% of treated hands | 2010 randomized trial |
| 3 months | Reported improved hand appearance | 97.6% of evaluated hands | FDA-reviewed trial, subject assessment |
| 3 months | At least 1-point gain on Merz Hand Grading Scale | 75% of treated subjects vs 3% of controls | FDA-reviewed randomized trial |
| 3 months | Physician satisfaction | 86% | 2010 randomized trial |
| 3 months | Patient satisfaction | 78% | 2010 randomized trial |
| 6 months | Physician satisfaction | 88% | 2010 randomized trial |
| 6 months | Patient satisfaction | 76% | 2010 randomized trial |
| 12 months | Improved on Global Aesthetic Improvement Scale | 75% of treated hands | 2010 randomized trial |
| After all treatments | One-point improvement | 79% of women | Retrospective study of 58 women |
| After all treatments | Two-point improvement | 21% of women | Retrospective study of 58 women |
These scores answer different questions. The Global Aesthetic Improvement Scale rates overall visible change. The Merz Hand Grading Scale works like a ruler for how severe volume loss looks. A one-point gain on Merz is a useful treatment target. It does not mean every hand will reach the same appearance, or that tendons and creases should disappear.
Read improvement and satisfaction separately
In the 2010 randomized trial, 75% of treated hands still scored improved on the Global Aesthetic Improvement Scale at 12 months. That supports a visible benefit lasting at least a year in most treated hands. It leaves each person's fade time open, because the first correction can soften before or after that visit.
Physicians and patients scored satisfaction differently at both 3 and 6 months. Set your own check before treatment: whether a cup, a sleeve, or a handshake still feels like your hand, and whether the fuller contour still looks like you in ordinary light. A clinician's favorable rating is one reading, not the only measure of success.
The retrospective study reports one-point improvement in 79% of women and two-point improvement in 21% after all treatments. That wording covers a completed course, which can include more than one appointment. Those findings do not show that everyone needs another session.
Look for a fuller contour that still looks like your hand, with normal anatomical landmarks still visible.
When you review photographs, match lighting, hand position, and how hollow the hand was before treatment. The same reading habits apply to a fat transfer before-and-after gallery. Photographs of fat transfer do not predict a filler result.
The 3-month assessment in the 2010 randomized trial is the primary timepoint those investigators used to judge settled contour. Use that kind of visit to compare daily use with the goal you set, and to decide whether further treatment would still serve it.
How the Hand Treatment Is Performed Step by Step
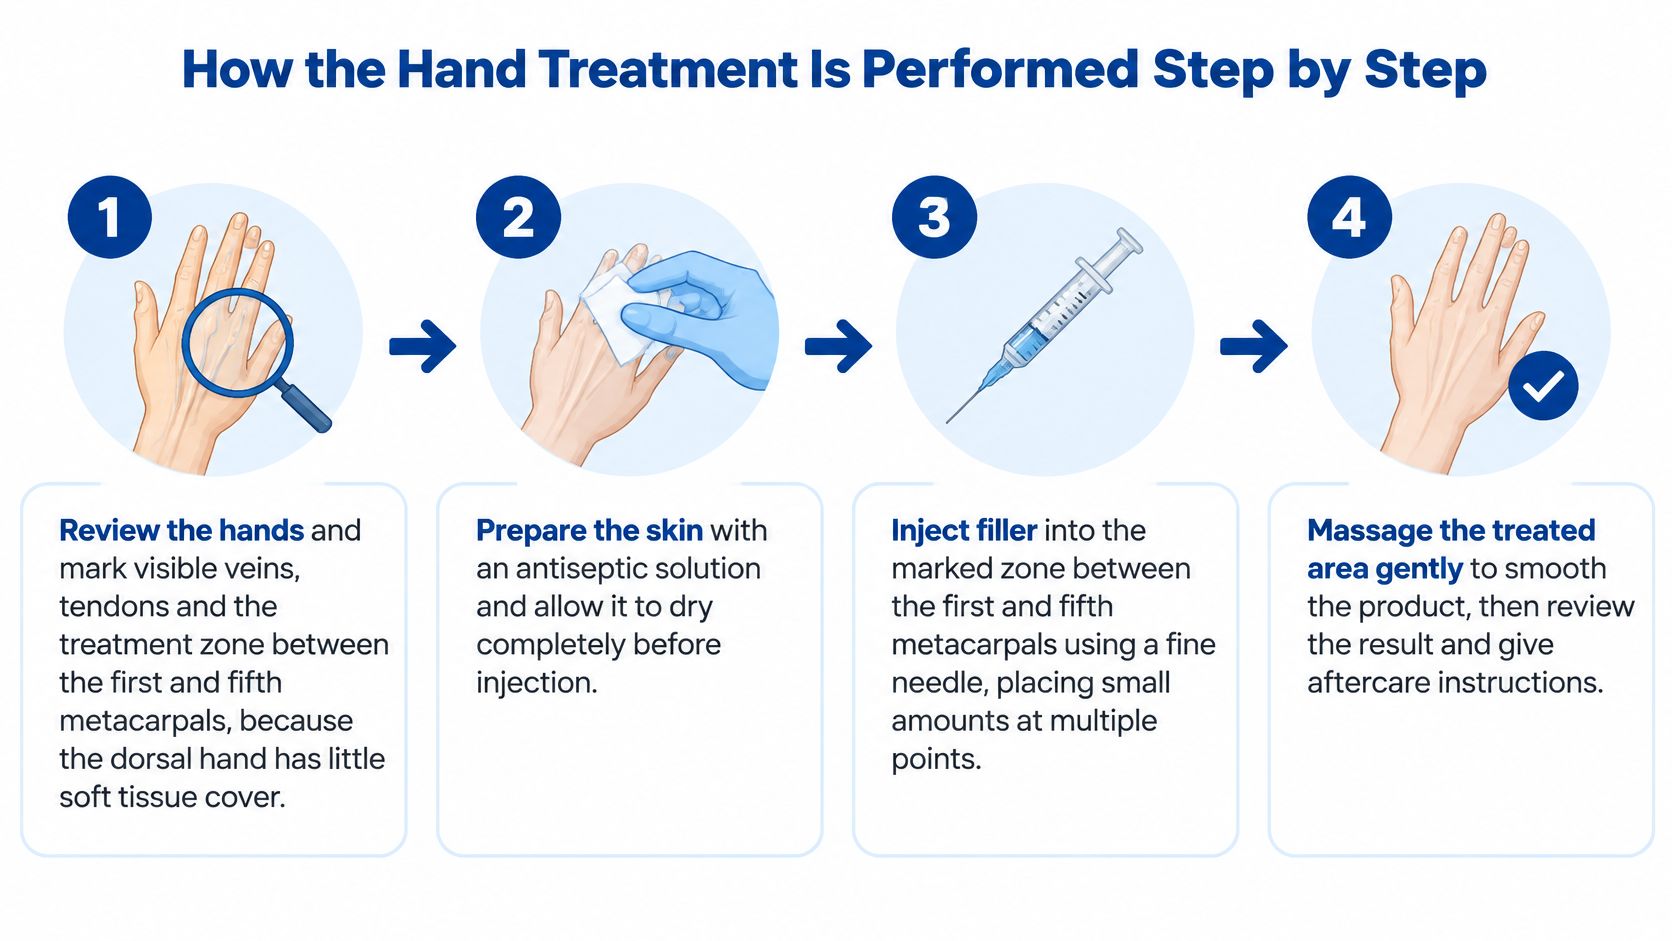
Hand filler is a medical injection procedure performed beneath the skin of a body part you use constantly. Each step below exists because of a specific feature of hand anatomy, so following the sequence shows you what the clinician is protecting: your ability to move, grip, and feel as well as how the hand looks.
Assessment and preparation
Review and map the hands. The clinician examines tissue thickness, visible vessels, tendons, and differences between the hands. The treatment region lies across the back of the hand, between the first and fifth metacarpals, the long bones within the hand. Mild asymmetry between your two hands is normal, and the map works with it rather than forcing both sides to match.
Prepare the skin aseptically. The clinician cleans the treatment area with an appropriate antiseptic and allows it to dry. This reduces contamination at the injection sites.
Choose an appropriate numbing approach. Local numbing may be used according to the treatment plan and your medical history. Comfort matters, and new or unusual pain during injection still needs to be reported immediately, because pain is one of the earliest signals that placement may be wrong.
Controlled placement and review
Select entry points away from vulnerable structures. FDA guidance describes beginning between the second and fourth metacarpals and avoiding placement near the metacarpophalangeal joints, the knuckles. Entry location accounts for movement and the thin tissue covering the structures underneath, since filler resting over a flexing joint sits in a mechanically hostile spot.
Place product beneath the dermis with controlled technique. The labeling describes advancement at approximately a 30-degree angle, with careful anatomical positioning. Because the layer between skin and tendon is thin, small depth errors matter here in a way they might not in a padded area like the cheek. Slow delivery and ongoing observation reduce risk, though no instrument or technique eliminates vascular risk entirely.
Measure the volume rather than chasing complete concealment. The FDA-reviewed study used no more than 3.0 mL per hand, averaging 2.5 mL per hand, equivalent to approximately 5 mL across both hands. Those figures describe study dosing, not a prescription for your hands. The right volume depends on how much tissue was lost and how much room the anatomy offers, and restraint matters practically: overfilling a thin compartment adds swelling, which extends the time before normal grip feels comfortable again.
Check contour and arrange reassessment. The clinician reviews symmetry, distribution, and any concerning symptoms before giving aftercare instructions. Early swelling can hide the final contour, so what you see in the mirror that evening is a temporary version of the result. An immediate impression should not automatically trigger more filler.
The delivery tool itself is a smaller decision than many patients expect. A prospective, evaluator-blinded comparison of needle and cannula delivery found equivalent clinical efficacy and comparable safety profiles, which means the clinician's anatomical knowledge and judgment carry more weight than the instrument chosen.
For background on the product itself, the Radiesse treatment overview can support the consultation discussion. The question that matters most is how the clinician adapts placement to your particular hand anatomy.
Risks, Warning Signs and the Recovery Timeline
A low-downtime label is not a recovery plan. Hands are working tools, and even a temporary reaction can interfere with grip, steering, typing, cooking, or lifting before it looks dramatic from the outside.
The FDA safety documentation sets the limits for planning: accidental injection into a vein can cause embolization or thrombosis, meaning material or a clot can obstruct blood flow; injection into a tendon may weaken it and lead to rupture; nodules, bumps, or lumps were reported in 12% of treated patients, sometimes persisting up to one year; and 68% of patients with Fitzpatrick skin types IV to VI reported temporary difficulty performing activities. Read those findings as scheduling constraints rather than scare tactics. A problem can be medically minor and still matter if your week depends on forceful grip, repetitive hand use, or reliable sensation.
Warning signs that shouldn't wait
Seek same-day medical assessment for a concerning change, particularly:
- Abnormal skin color: Pale, blue, or dusky areas.
- Disproportionate pain: Severe pain or pain that intensifies rather than easing.
- Altered circulation or sensation: A cold hand, numbness, or unusual loss of feeling.
- Sudden functional change: Rapid swelling or weakness moving the fingers or wrist.
Contact the treating clinician immediately. Seek emergency care for signs of reduced blood flow instead of waiting for a routine follow-up or trying to manage the problem yourself.
Plan recovery around the task
During the initial recovery period, swelling, redness, tenderness, and bruising can make the hands uncomfortable. Firmness may also occur, but every firm area should not be assumed to be harmless settling.
| Activity | Practical recovery decision |
|---|---|
| Typing and light household tasks | Try brief periods as tolerated. Stop if discomfort or swelling increases. |
| Gripping weights | Resume only when your clinician's advice and comfortable grip permit it. |
| Manual work | Arrange modified duties if work requires forceful gripping, vibration, or repetitive loading. |
| Driving | Don't drive unless you can grip, steer, and respond safely without limiting pain. |
| Travel or an important event | Leave a generous buffer and make sure you can access follow-up care. |
A keyboard worker may be able to shorten sessions and spread tasks across the day more easily than someone who lifts equipment, pulls cables, or uses vibrating tools. Neither person should treat the absence of a surgical incision as proof that work will be unaffected.
Allow at least two weeks before travel or an important event as a conservative planning buffer, not a recovery guarantee. The FDA findings on prolonged or function-limiting reactions mean some people need longer, and a departure date should never become a reason to ignore symptoms.
Recovery rule: Resume demanding activity because your hands function comfortably and your clinician agrees, not because a marketing description called the treatment low downtime.
Painless firmness that gradually softens is less concerning than a lump that grows, hurts, becomes warm, or changes color. Persistent lumps still deserve reassessment. Do not diagnose them yourself or assume that waiting indefinitely is the only option.
Aftercare and Protecting Your Results
Your clinician's written aftercare instructions come first. Before leaving, clarify what you may do with your hands, what symptoms require a call, and how to obtain urgent help outside normal appointment hours.
Keep injection sites clean and avoid firm pressure or massage unless specifically directed. Ask whether a cool compress is appropriate and how to apply it without pressing heavily on treated tissue.
Keep home care simple
- Reduce mechanical strain: Limit heavy gripping while the hands remain swollen or tender.
- Avoid excessive heat: Hold off on hot tubs and saunas until your clinician says they're appropriate.
- Protect exposed skin: Use sunscreen or protective gloves to reduce further sun exposure.
- Leave lumps alone: Don't squeeze, puncture, or repeatedly massage a firm area.
Fever, spreading redness, increasing warmth, or pus at an injection site warrants prompt contact with the treating clinician. These aren't reasons to experiment with home treatments.
Use photographs, not memory
Start a dated photo log before treatment. Photograph the backs of both hands in the same lighting, position, and camera distance, without filters.
Bring those images to your planned follow-up so you can discuss contour rather than relying on how your hands looked during early swelling. Book that review before leaving the clinic; a touch-up should follow an assessment, not an automatic assumption that more product will improve the result.
Confirm Your Hand Plan at a Consultation
An in-person consultation is the practical next step if volume loss bothers you and you're willing to accommodate recovery. At Ideal Face & Body in Beverly Hills, CA, our practice is led by Dr. Justin Yovino, with physician injector Dr. Sarah Yovino.
We list Sculptra Biostimulator, Radiesse Biostimulator, and Renuva Fat Stimulator among our non-surgical treatments. That doesn't mean these products are interchangeable or that each is appropriate for your hands.
Bring questions that test the plan
- Anatomy: How will you identify and avoid vessels and tendons?
- Treatment scope: What volume and number of appointments do you anticipate, and why?
- Daily responsibilities: How should I plan around driving, exercise, work, or caregiving?
- Complication response: Who should I contact if a lump, circulation change, or other concerning symptom appears?
- Success criteria: What visible change would count as a worthwhile result for my starting anatomy?
For broader preparation, Ringway Dental's discussion of is dermal filler treatment safe offers additional safety questions to bring to an appointment. General filler education should complement, not replace, a hand-specific medical assessment.
Proceed only when the goal concerns the back of the hand, the timing fits your responsibilities, and the clinician can explain both anatomical precautions and follow-up. You shouldn't need pressure, guaranteed results, or promises of effortless recovery to feel comfortable deciding.
Ideal Face & Body offers Radiesse hand rejuvenation for adults considering treatment for lost volume and prominent-looking tendons and veins. Visit Ideal Face & Body to arrange a consultation and discuss your hand anatomy, desired contour, and a recovery plan that fits your daily life.