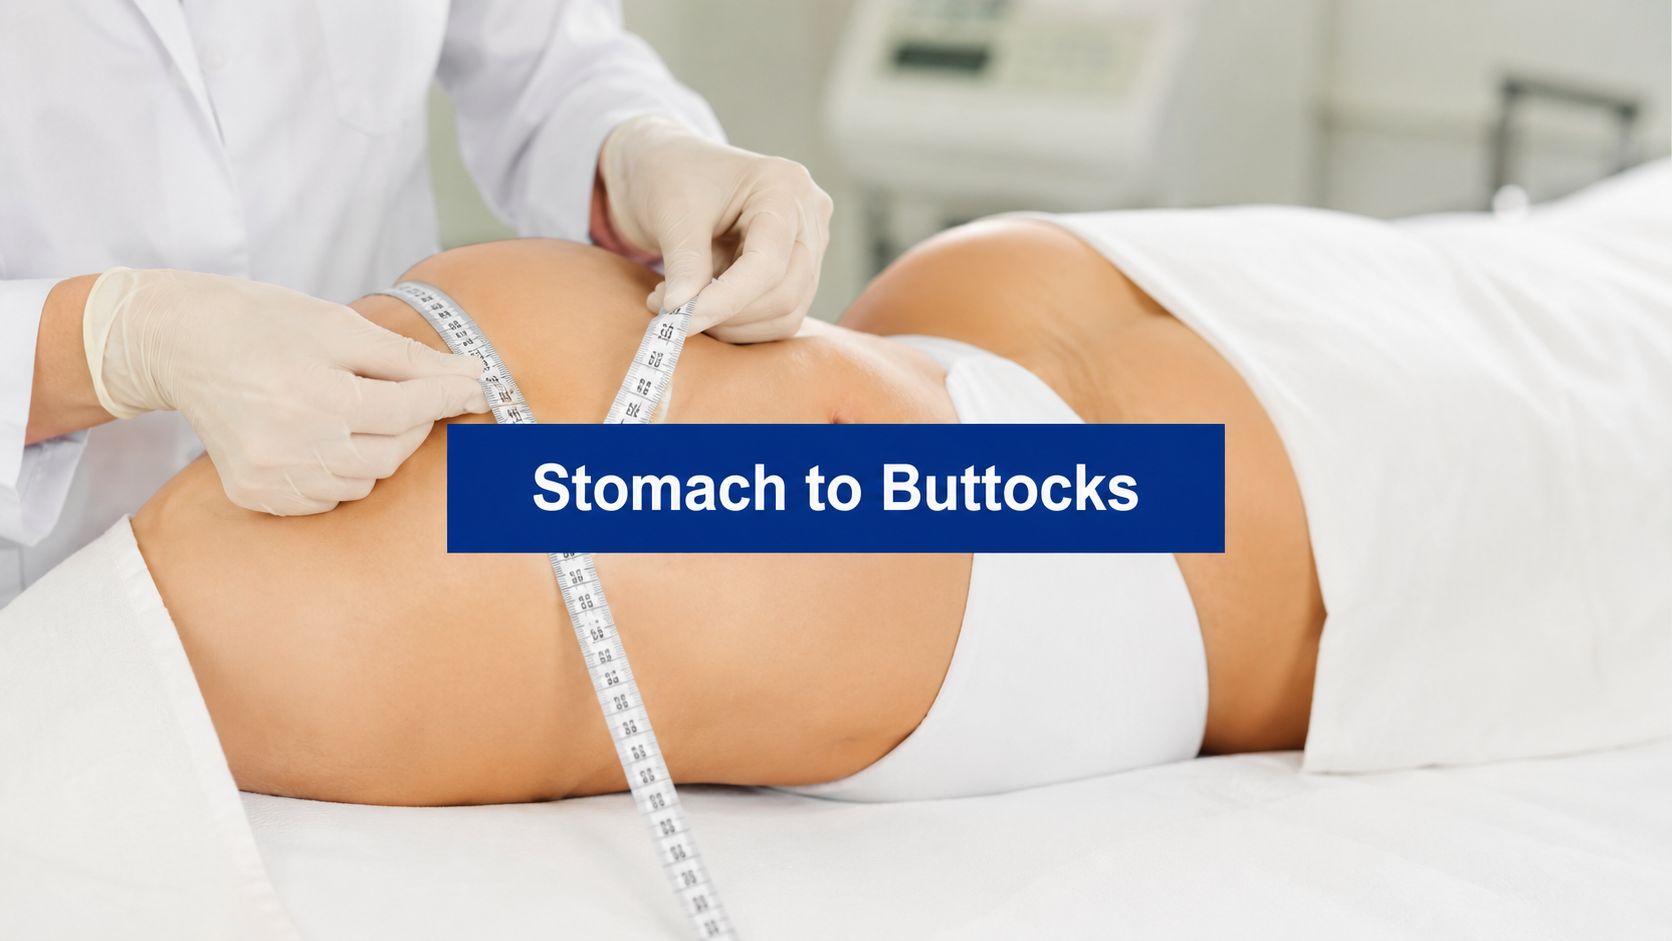
You're probably looking at before-and-after photos, reading conflicting comments, and wondering whether fat transfer from stomach to buttocks is really a clean way to get shape without implants. That confusion makes sense. The procedure sounds simple on the surface, but the outcome depends on living fat cells surviving a transfer, and that biology is where expectations often drift away from reality.
Table of Contents
- What Fat Transfer From Stomach to Buttocks Actually Involves
- The Three-Step Surgical Process Explained
- Understanding Fat Survival and Realistic Retention Rates
- Awake Office-Based BBL Versus Traditional Operating Room Surgery
- Recovery Timeline and Post-Operative Care Essentials
- Safety Protocols and Risk Mitigation Strategies
- Why Proprietary Techniques Like PRECISION SCULPT and Awake Butt Lift Matter
What Fat Transfer From Stomach to Buttocks Actually Involves
A lot of people search this procedure after noticing the same frustrating pattern. They can slim their waist with exercise and diet, but the lower abdomen seems to hold on to fat. That's one reason the stomach is such a common donor area for body contouring, and why a fat transfer from stomach to buttocks can create two changes at once, less bulk in the midsection and more volume in the hips and buttocks.
The key point is that this isn't just “moving fat” from one place to another. It's autologous fat transfer, which means the surgeon removes your own fat cells, processes them, then places them where they can survive and build a new blood supply. The result depends on biology, not just on how much fat was removed or how much was injected.
A careful consultation should focus on donor availability, skin quality, and what shape your body can realistically support. If you want a deeper overview of the procedure's goals and anatomy, this patient guide to fat transfer planning gives useful background.
Practical rule: the abdomen is often chosen not because it's the biggest fat depot, but because it can improve the waistline while supplying graft material for the buttocks.
That dual effect is part of the appeal. It can narrow the middle and add projection below, but the final look still depends on how much of the graft takes hold.
The Three-Step Surgical Process Explained
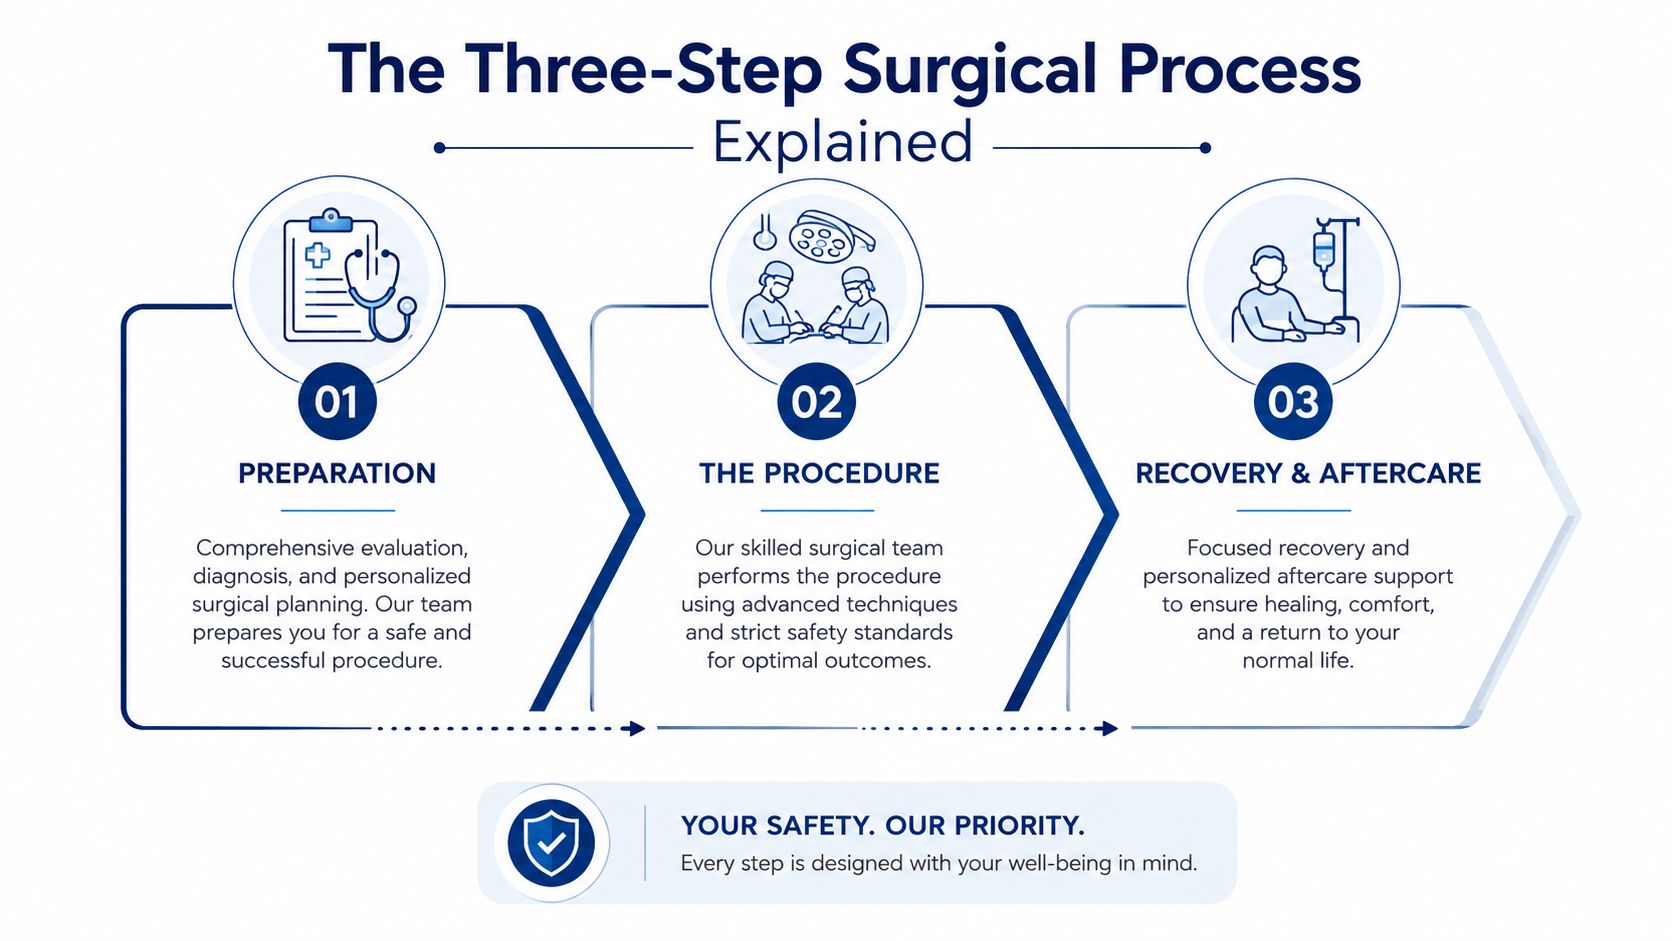
A successful fat transfer from stomach to buttocks depends on more than moving tissue from one place to another. The standard sequence is simple on paper, but each stage shapes whether the graft has a real chance to live. The NHS describes surgical fat transfer as a three-part process, fat is removed with liposuction, the harvested fat is purified, and the purified fat is injected into the buttocks (NHS surgical fat transfer). That basic outline matters because fat cells are living tissue, and living tissue has to be handled like a transplant, not like filler from a tube.
1) Harvesting the fat
The first step is liposuction. The surgeon removes fat from the abdomen, and sometimes from the hips, lower back, or thighs, depending on where there is usable donor tissue and how the body is shaped. In surgical literature, large-bore harvest tools and syringe-based collection are common methods because the fat needs to be treated gently from the moment it leaves the body.
The comparison to transplanting a plant is useful here. If the roots are damaged during extraction, the plant has a harder time taking hold after replanting.
2) Purifying the graft
The harvested fat is not injected right away. It is processed to separate the usable fat cells from blood, oil, and damaged material. Techniques described in the literature include centrifugation, filtration, and sedimentation, all meant to leave a cleaner graft that can be placed more evenly and with less trauma.
This step matters because the surgeon is preparing a living graft, not a cosmetic paste. The better the tissue is handled, the more likely it is to revascularize once it is in place.
3) Reinjection into the buttocks
The final step is placement. Surgeons often inject the fat in multiple thin passes and small aliquots across different tissue planes, a method meant to maximize contact with well-vascularized tissue. A peer-reviewed review recommends avoiding intramuscular injection, using a cannula of at least 5 mm, and keeping the cannula at an acute angle to the skin during gluteal fat transfer (fat grafting technical review).
The graft does not “settle” by force. It survives when the surgeon places it where blood supply can reach it quickly enough.
That is why the technique is so dependent on precision. The goal is not to pack in as much fat as possible, but to place small amounts where the tissue can nourish them. For readers who want the recovery side of the process explained in practical terms, the recovery and procedure overview here connects the surgical steps to what patients usually experience afterward.
Understanding Fat Survival and Realistic Retention Rates
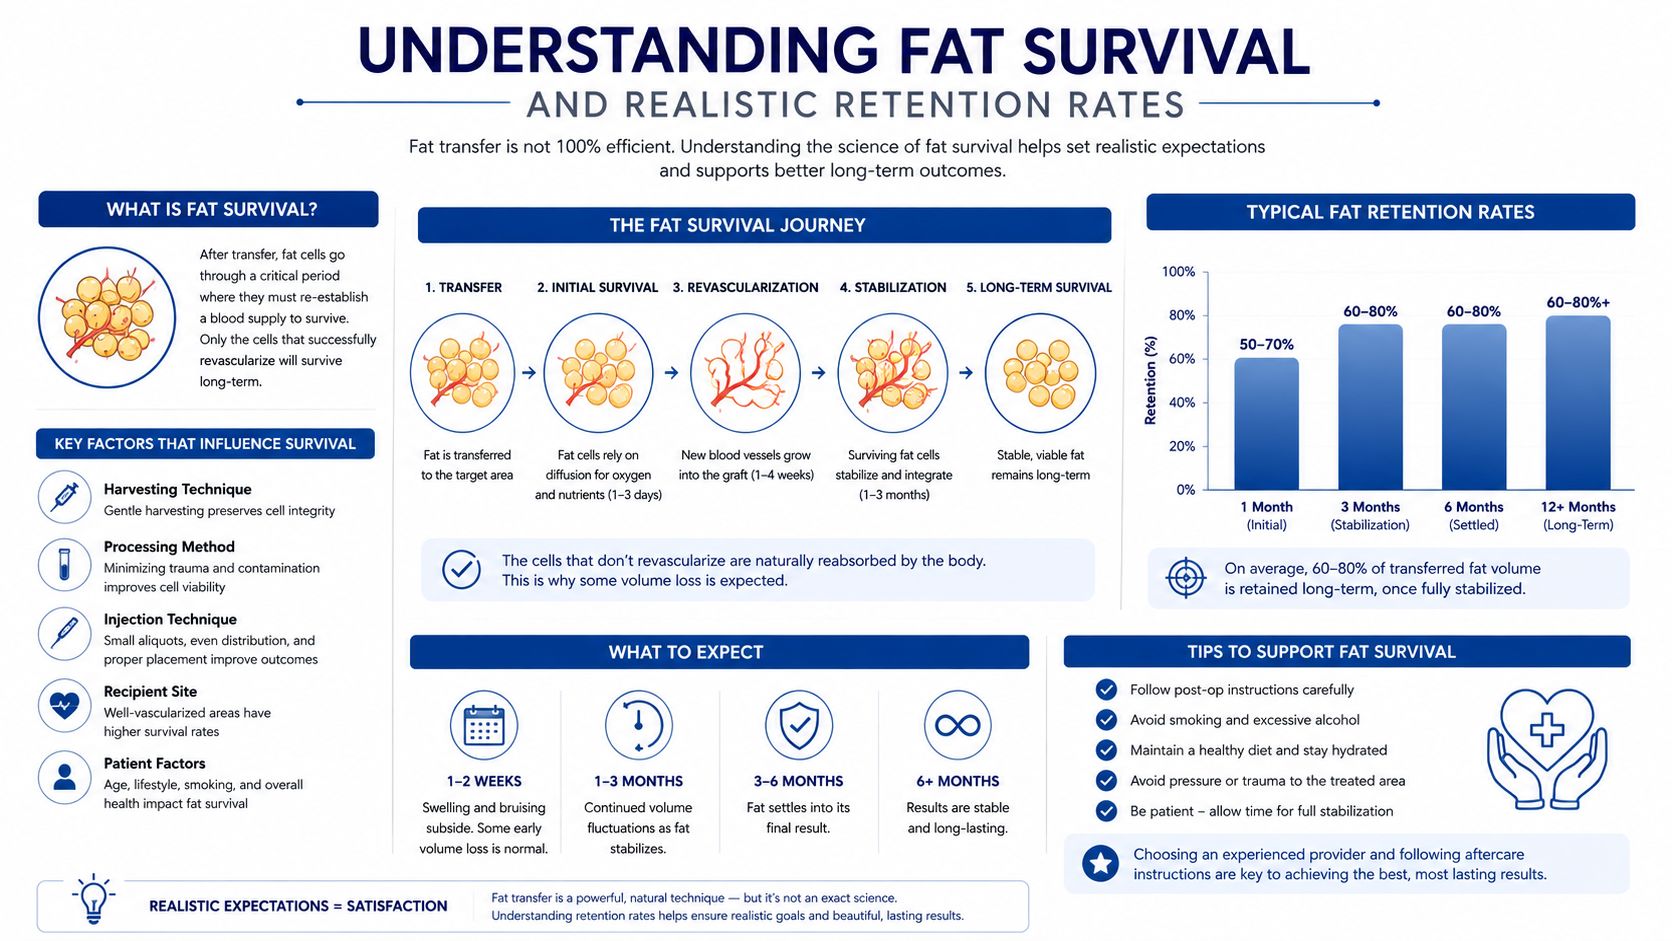
A patient can leave the operating room looking noticeably fuller, then wonder why the shape softens over the next few months. That change is normal biology. After a fat transfer from stomach to buttocks, the graft is a living tissue transplant, so some fat cells survive by connecting to a new blood supply, while others are reabsorbed as the body heals.
That is the part many glossy pages leave out. Final contour depends less on the amount injected and more on how much of that graft remains alive after transfer. A prospective controlled study reported a mean calculated fat retention of 66% after buttock fat grafting, while a clinical review found published retention rates in many fat grafting series ranging from 25% to 50%, with some reports as high as 80% to 90% (buttock fat grafting retention study and review). Those numbers are not a promise. They show why patients should expect variability.
Why the numbers vary
Retention changes with tissue handling, placement, and the amount of pressure the area faces during healing. Small, carefully spread deposits usually survive better than large crowded pockets of fat because each graft piece needs room to connect to nearby blood vessels. If the graft sits too densely, the center of that cluster can be slow to revascularize, and those cells are the ones most likely to be lost.
The surgeon's job is to create the right biologic conditions, not just add volume. That is why the same operation can produce different retention from one body to another, even when the technique appears similar on the surface.
In one buttock study, the mean fat volume injected per buttock was 287 mL and ultrasound showed increases of 0.66 cm in right-buttock subcutaneous thickness and 0.86 cm in the left buttock after surgery (buttock fat grafting retention study and review). Those measurements show that contour improvement can be real and measurable. They also show why the result should be understood as a biologic outcome, not a fixed transplant.
What patients should expect
Surgeons usually plan with overcorrection in mind because some resorption is expected. Final shape also takes time to settle. Independent clinical references note that results stabilize over about 6 months, and that transferred fat commonly survives at around 60-80% in buttock fat transfer discussions (Cleveland Clinic fat transfer overview).
That timeline helps explain why the early result and the final result can look different. Swelling, tissue tension, and the body's repair response all change the appearance before the graft reaches its more stable phase.
If recovery discomfort starts to feel broader than expected, find pelvic pain treatment after liposuction can help patients understand when soft-tissue healing may need extra support.
Realistic takeaway: good surgery does not mean all the fat stays. It means the surgeon plans for normal resorption and shapes the result around what the body is likely to keep.
Touch-up procedures can be part of the process, not a sign that something failed. The goal is a stable contour that fits your anatomy after healing, not the immediate swelling seen in the operating room.
For readers who want the procedure context that leads into these biology-based expectations, this overview of awake liposuction and fat transfer options explains how the treatment is organized from consultation through recovery.
Awake Office-Based BBL Versus Traditional Operating Room Surgery
Some patients care most about comfort, others care most about the anesthesia setup, and many care about both. An office-based, awake approach uses local anesthesia so you stay conscious, while a traditional operating room setting often relies on deeper anesthesia support. The right choice depends on your medical profile, tolerance for being awake, and how your surgeon prefers to manage the operation.
Awake surgery avoids the grogginess and nausea many people associate with general anesthesia. It also removes the need for IV anesthesia in many cases, which some patients find reassuring. Because you're awake, you can sometimes shift position when your surgeon needs you to hold a side-lying posture or adjust for symmetry.
How the experience differs
In an awake setting, the environment tends to feel more direct and personal. You're present for the procedure, but numbed where the work happens. That can make the day feel less disconnected, and for some patients, less stressful than waking up from deeper sedation.
In a traditional operating room, the anesthesia team takes over more of the physiologic monitoring and medication management. That can be the better fit for people with higher anxiety, complex plans, or medical needs that call for a broader anesthesia setup. Neither path is automatically right for everyone.
The body-contouring page for awake liposuction and fat transfer options is useful if you're comparing how a local-anesthesia approach feels in practice.
What to ask yourself
- Do I want to be awake during surgery, or does that idea make me tense?
- Does my surgeon offer a setting that matches my medical history and comfort level?
- Would I rather prioritize a quicker discharge experience, or do I need the structure of a traditional OR?
The best anesthesia plan is the one that matches the patient's needs and the surgeon's technique, not the one that sounds most dramatic online.
A thoughtful consultation should make this choice feel clear, not confusing. If the explanation is vague, ask for specifics about monitoring, positioning, and recovery expectations.
Recovery Timeline and Post-Operative Care Essentials
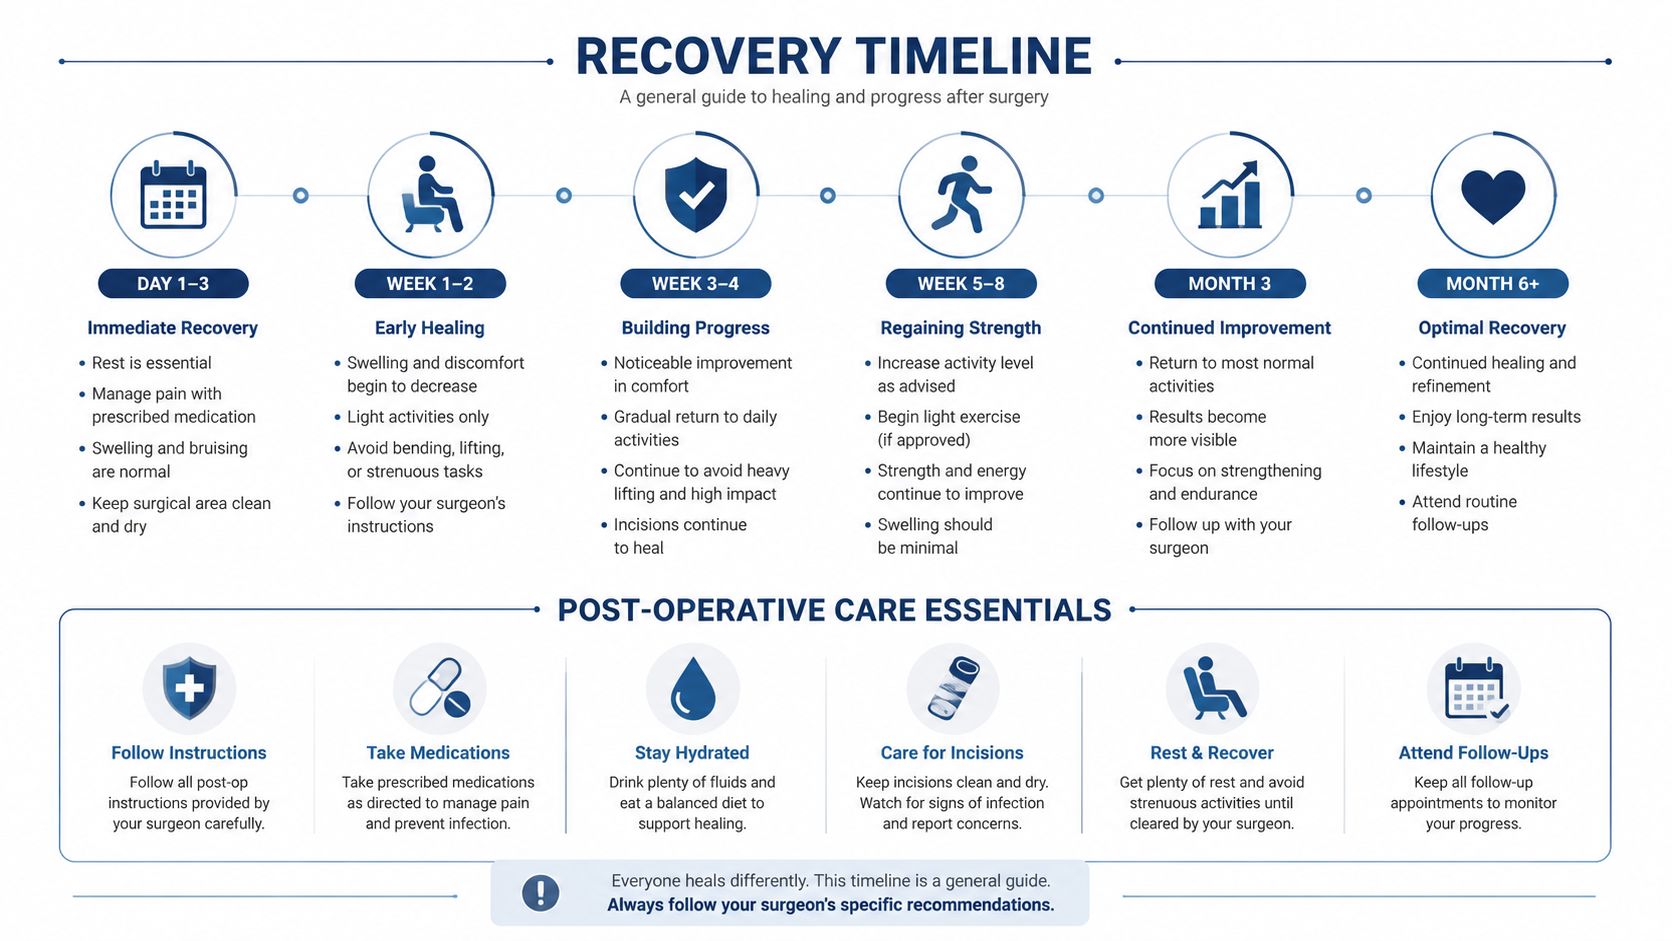
The early recovery period is where many patients underestimate the work involved. The liposuction sites need support, and the grafted buttocks need protection from pressure while the transferred fat is trying to establish blood supply and survive. That means your day-to-day routine changes for a while, especially around sitting, sleeping, and moving around the house.
The first phase
Right after surgery, compression garments are typically used on the donor sites to control swelling and help the liposuction areas settle. The buttocks, meanwhile, need to be protected from direct pressure because compression can reduce graft survival. That is the biological tradeoff patients need to understand. The Cleveland Clinic notes that patients are commonly advised to avoid pressure on the grafted area for weeks after surgery.
Daily life during healing
Many patients plan their sleeping position ahead of time, using pillows or recliners to keep pressure off the buttocks. Driving, working, and routine errands all need to be scheduled around that restriction. The practical challenge is not only pain, it is posture, because even a brief pause in the wrong position can press on the transferred fat.
If you want ideas for making that home setup easier, recovering from surgery at home is a useful resource for supplies and day-to-day logistics.
When results show themselves
Swelling fades gradually, and the contour becomes easier to judge as the tissues calm down. That is why a patient cannot fairly evaluate the final shape in the first few days. The transferred fat needs time, and the body needs time to stop reacting to the procedure itself. Some fat cells survive and become part of the new tissue, while others do not, which is why early fullness can be misleading.
For a fuller breakdown of what that recovery period looks like in practice, the buttock fat transfer recovery guide covers the day-to-day details of healing.
Contact your surgeon promptly if pain suddenly worsens, redness spreads, or one side looks dramatically different from the other.
Most of recovery is uneventful, but the warning signs that do appear deserve attention quickly. That helps protect comfort and gives the graft the best chance to settle well.
Safety Protocols and Risk Mitigation Strategies
A careful discussion of buttock fat transfer has to start with safety. The field changed because earlier concerns around gluteal fat grafting forced surgeons to be more precise about where fat is placed, how far it is injected, and which instruments are used. Patients should expect a surgeon to explain those choices in plain language.
The safety literature shows that complications can still occur, even in experienced hands. A systematic review found an overall complication rate in pooled buttock fat transfer data, and broader fat-transfer reviews describe infection and fat necrosis as recognized risks (systematic review and broader fat-transfer review). Those findings do not make the procedure inappropriate, but they do show why patients need a surgeon who treats safety as part of the operation itself, not as an afterthought.
Technique matters more than slogans
Safe gluteal fat transfer depends on staying in the subcutaneous layer, not the muscle. The technical review cited earlier recommends avoiding intramuscular injection, using a blunt or appropriate cannula, and keeping the cannula oriented safely during placement (fat grafting technical review). Those details are not cosmetic trivia. They are the basic rules that help reduce avoidable risk.
A useful way to understand this is to think about the fat as living tissue that must survive a transfer, not as filler that gets placed and forgotten. Gentle handling, controlled placement, and clear respect for tissue planes all support safety while also helping the graft settle better.
What a strong consultation should cover
- Where the fat will be placed: The surgeon should be specific about the tissue plane used.
- What donor areas are being considered: Belly, hips, lower back, and thighs can all be used depending on anatomy.
- How the surgeon handles graft placement: Small aliquots and layered placement matter.
- What facility is being used: Accredited settings matter because emergency readiness matters.
- How results are tracked: Before-and-after photos and real follow-up patterns tell you more than marketing language does.
Good candidates usually have enough donor fat, stable expectations, and the patience to respect recovery rules.
The safety profile also depends on the surgeon's judgment during planning and on the way the graft is handled during the case. A surgeon who explains why a certain plane is chosen, why a cannula is selected, and how fat is distributed is showing you the thinking that helps reduce risk. That is more useful than a glossy promise of perfection.
A surgeon's experience, board certification, and willingness to answer hard questions are part of the safety profile too. If the consultation feels rushed, that is a problem.
Why Proprietary Techniques Like PRECISION SCULPT and Awake Butt Lift Matter
Some patients assume all fat transfer procedures are the same once the surgeon starts liposuction. They're not. The harvest method, anesthesia choice, and placement style all shape the result, which is why some practices use a named protocol for each step rather than treating the case as a generic body-contouring operation.
At Ideal Face & Body, PRECISION SCULPT refers to laser-assisted liposculpting used during the harvest phase, and the Awake Butt Lift approach uses local anesthesia in an office-based setting. In practical terms, that means the surgeon is working with a technique designed to reduce tissue trauma while keeping the patient comfortable and awake enough for selective repositioning when needed. The combination is meant to support meticulous control at each stage, from donor-site shaping to graft placement.
That matters because fat transfer is a biology-driven procedure. A cleaner harvest, gentler handling, and careful placement all serve the same goal, giving the graft a better chance to survive. The literature already makes clear that graft survival is variable, so the best surgical systems are the ones built around that reality rather than pretending it doesn't exist.
For patients comparing options, Dr. Justin Yovino and Dr. Sarah Yovino represent one office-based path among several. The decision should come down to comfort with the anesthesia plan, confidence in the surgeon's technique, and how clearly the team explains expected retention and recovery.
If you're considering this procedure, Ideal Face & Body can help you evaluate whether your anatomy, goals, and recovery timeline fit a fat transfer plan. Visit Ideal Face & Body to review the approach and request a consultation if you want a surgeon-led discussion of donor sites, retention expectations, and awake body-contouring options.